App Editor
The App Editor is used to create a bundle of process and case models together that can be deployed and shared with users to run. Processes, cases, forms and decision tables do not need to be packaged in an app to be deployed, as it is possible to deploy them individually directly. An app provides a convenient packaging with additional services automatically managed for you.
User Interface
The App Editor allows the definition of an application bundle of processes, cases and other related models. An app, once defined, can be published (deployed) to the runtime engines and started by users.
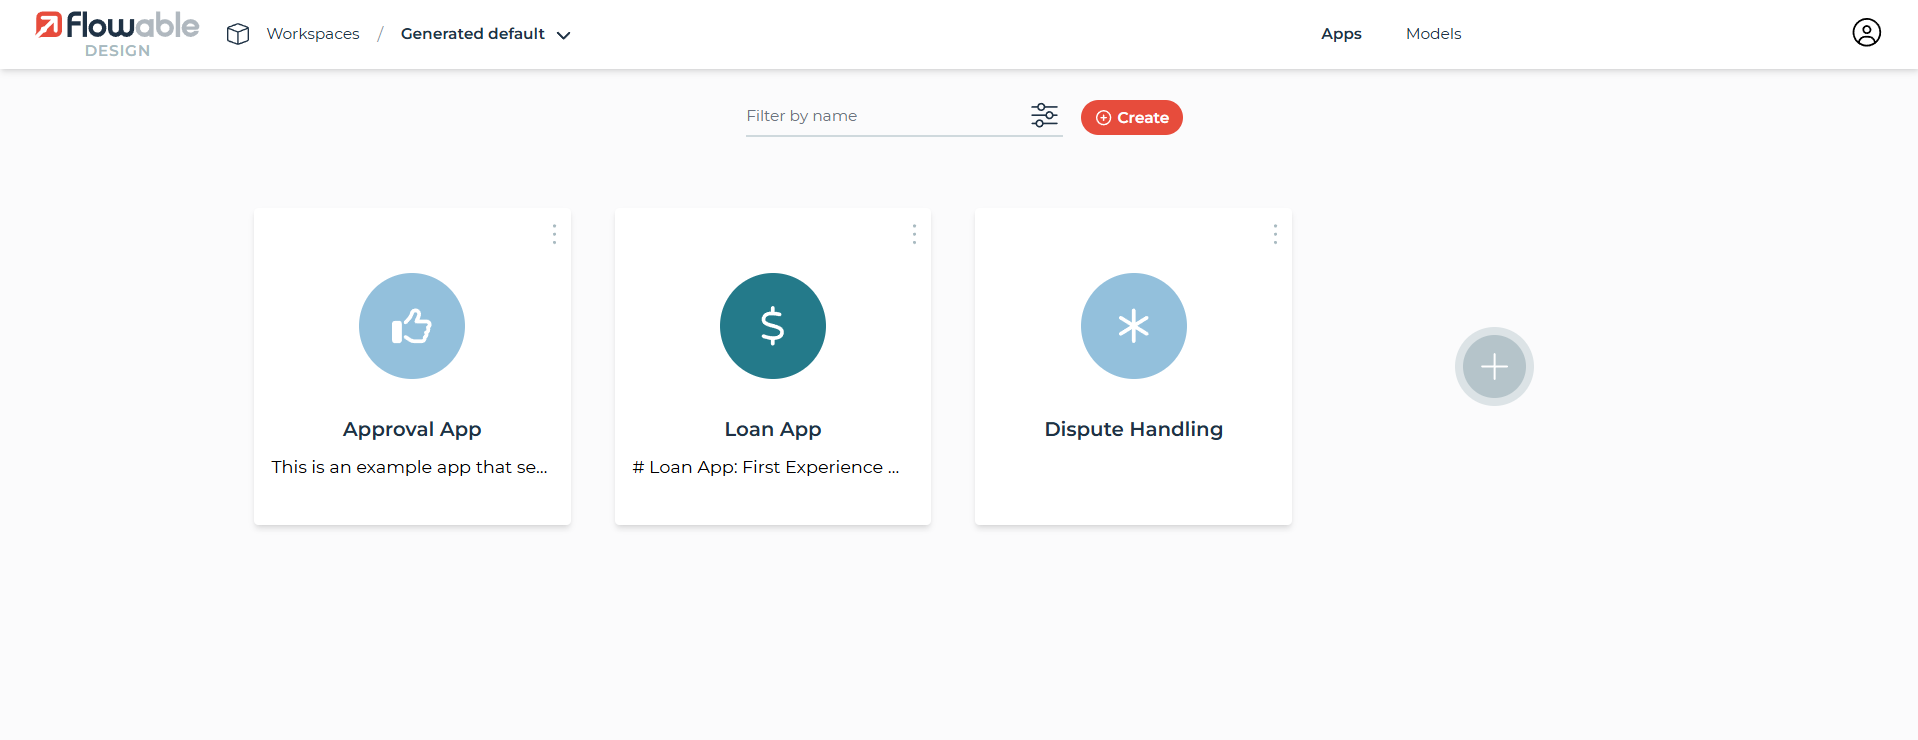
A list of the existing apps is displayed, ordered by date or name, with the ability to:
- View and modify an app by clicking on its card, see App Editor
- Create new apps, see Creating New Apps
- Import apps, see Importing Apps
Clicking the + card opens a dialog that allows you to choose to create a new app or import an existing app definition.
Creating New Apps
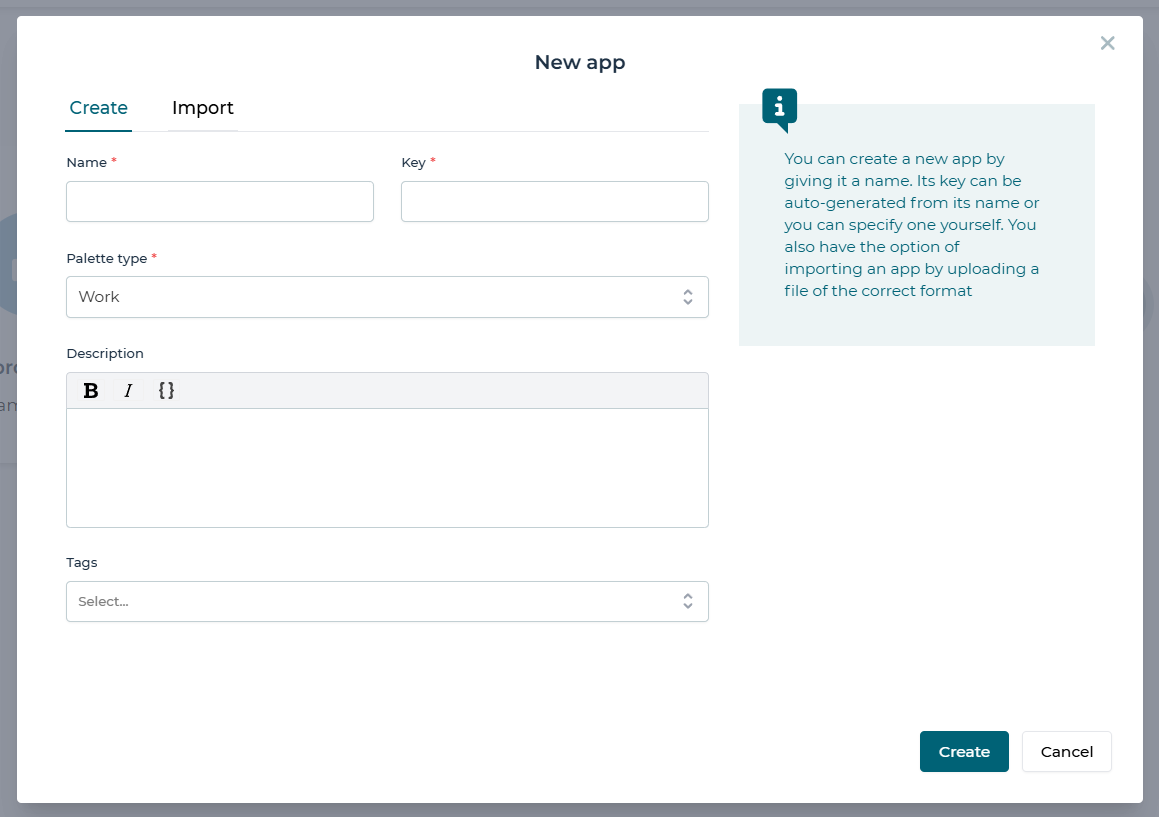
Choosing the Create a new app option opens a dialog that prompts you to enter
basic information:
- The display name of the app
- The app's unique key
- The app's palette type
- An optional description of the app
- An optional tag for the app
By clicking Create, a new app definition is created and
you are redirected to the details view of the app where you can make further
configurations. See App Editor for more information.
Importing Apps
Choosing the Import an app from a file option opens a dialog that prompts you to select a file to import.
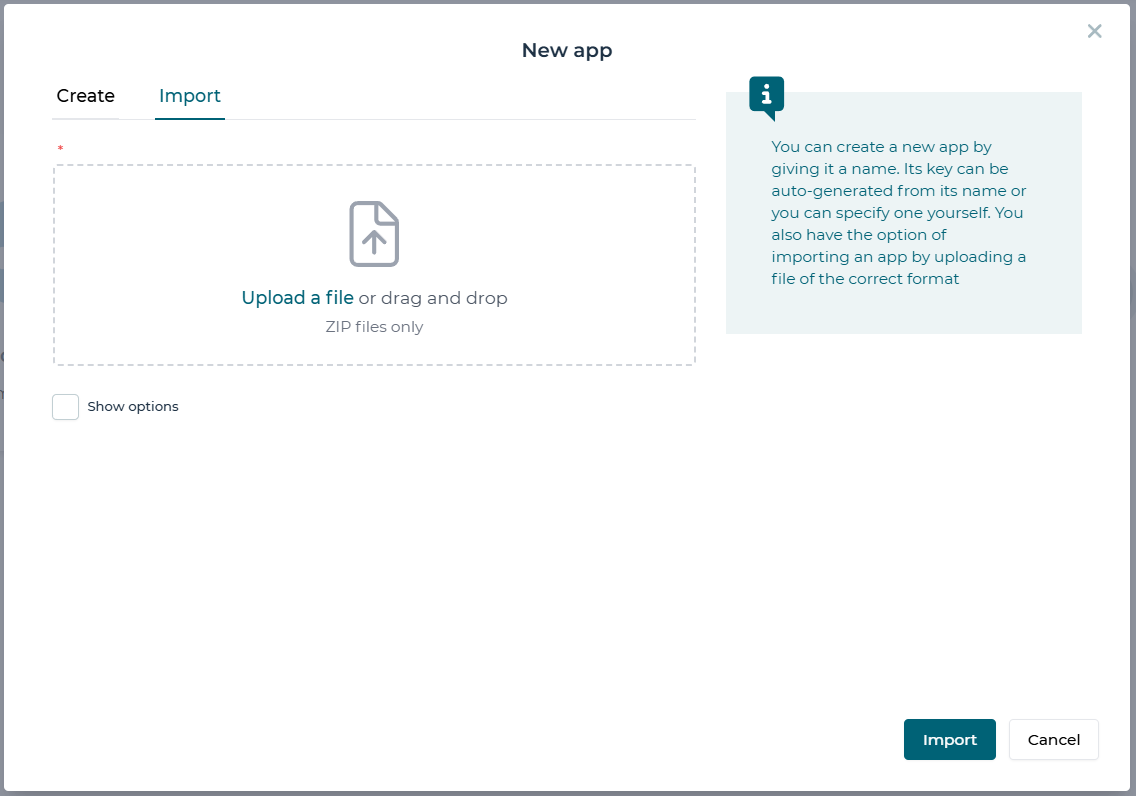
There are advanced options that define how the import, which can be selected if needed to perform extra steps in the import.
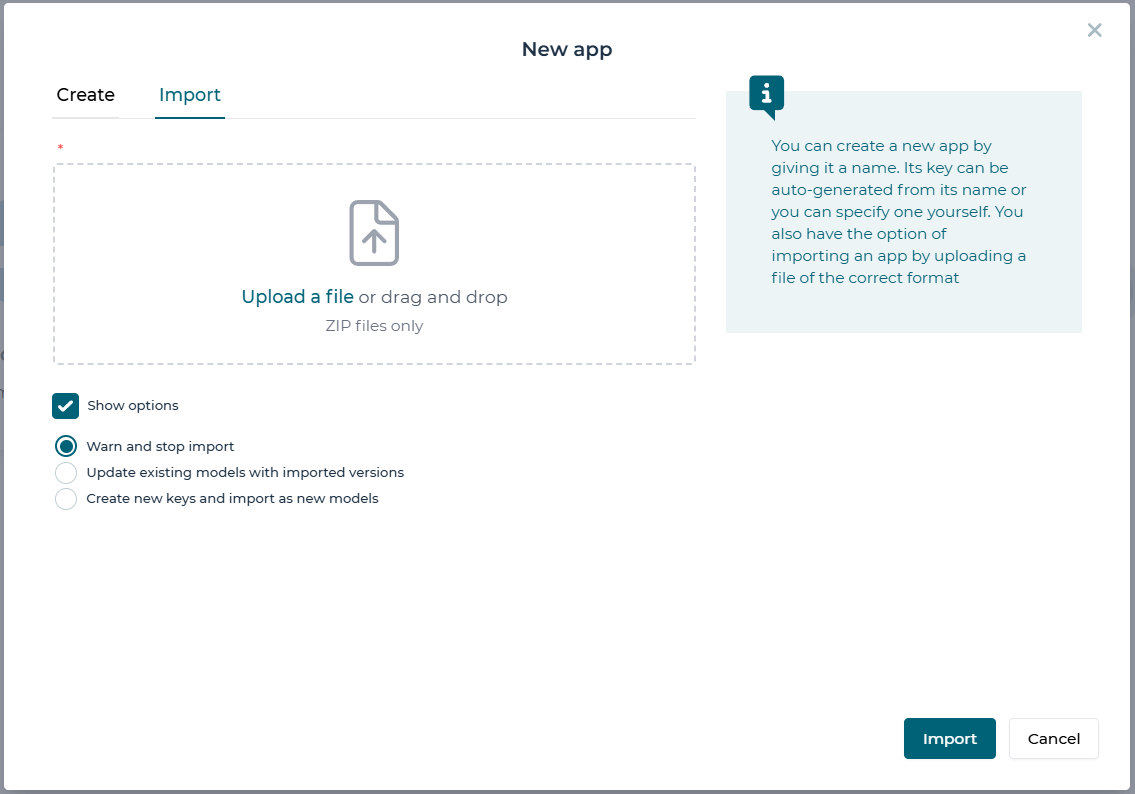
The options available are:
| Option | Comment |
|---|---|
| Renew | Attempt to link users and groups if imported from another system. |
| Edoras One app | Import a legacy app format. |
| Warn and Stop | If identical model keys are found, warn the user and stop. |
| Update existing | If identical model keys are found, continue and treat as updates. |
| Create new keys | If identical model keys are found, continue and create as new models. |
App Editor
In the header area, you can see the name, description, version, creator and the modification date of the app definition. The models that are already included in the app are also shown. It is always possible to return to this app view by clicking the app name in the top navigation menu.
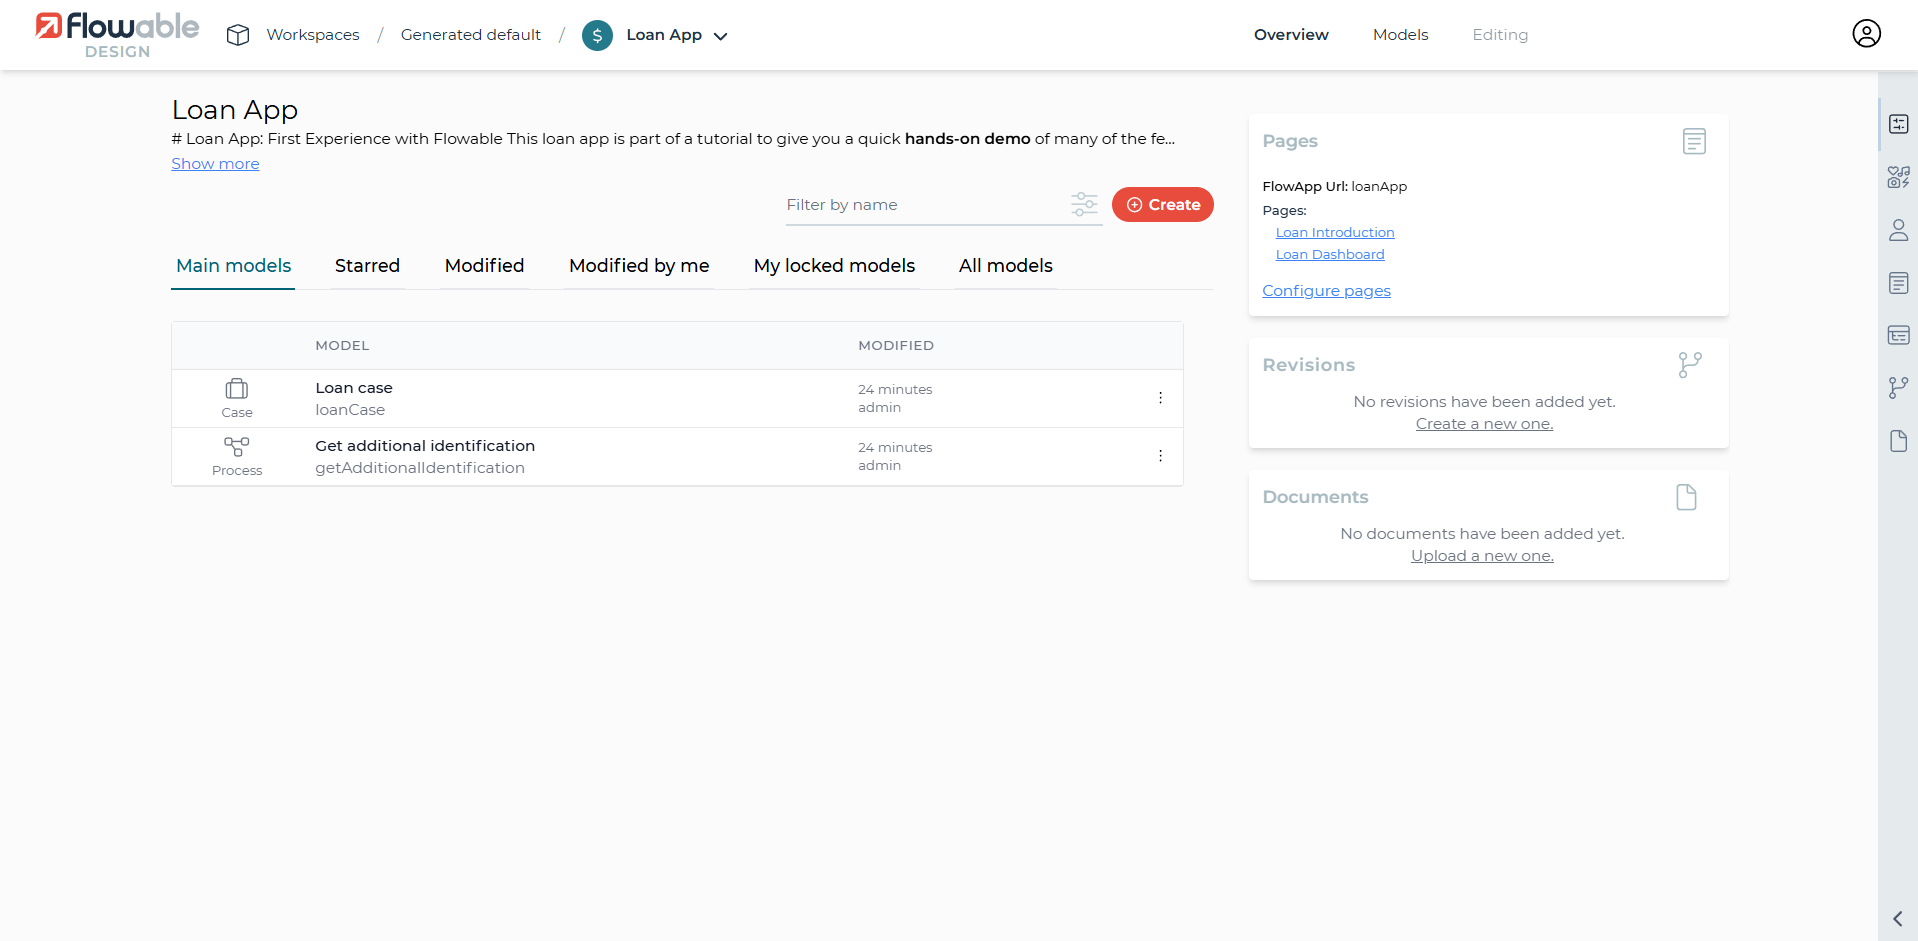
name, key, description, Tags, Palette of the app model are included in the app Details, together with the Model Hierarchy

Order, Icon, and Theme of the app are included in the app Appearance section.
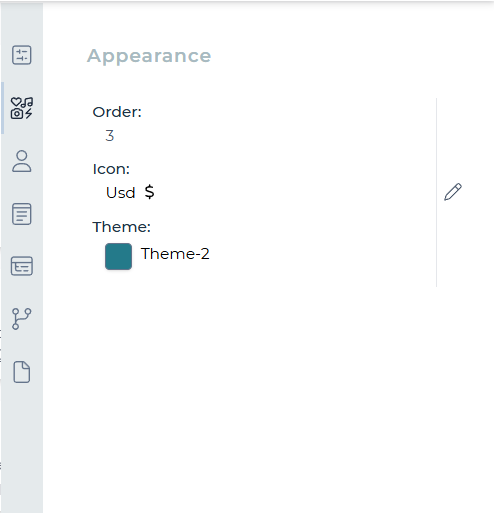
The app theme can be selected by clicking on Theme

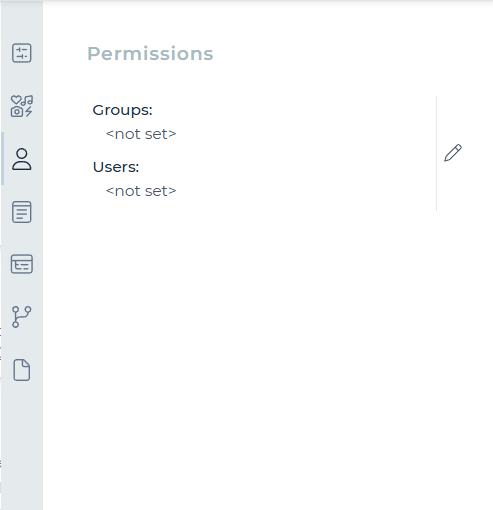
Groups and Users are included in the Permissions section.
 note
noteIf the groups and users are left undefined, all groups and users can access the app definition when deployed. Please note that the user and group restrictions only apply to the deployed apps and do not have any effect on users of Flowable Design.
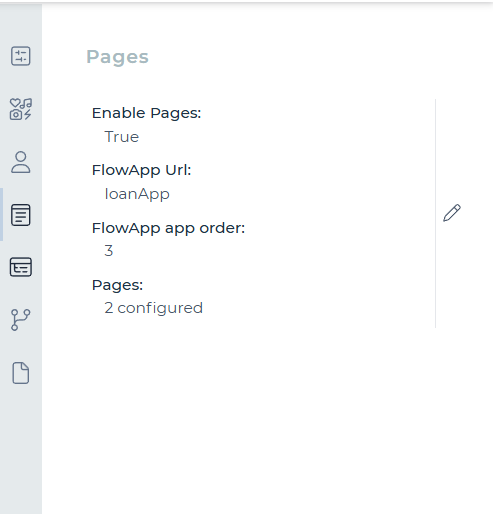
The Pages section allows you to define app pages.
The Variables section allows you to define app variables.
The section Revisions provides an overview of your existing revisions and allows you to create a new revision.
The section Documents provides an overview of your existing documents and allows you to create and add new documents. See Adding FlowApp Pages

App Features
The App Editor allows you to define its appearance, features and allowed users. You can set the following features for an app:
- An icon that can be used to distinguish it from other apps.
- A theme that, similarly to the icon, can be used to further differentiate the app both in Flowable Design and any other application, such as Flowable Work and Flowable Engage.
- Groups of users that can access the app.
- Specific users that can access the app.
A number of actions can be performed on an app. These are available as buttons or in a dropdown menu in the app header area.
| Action | Description |
|---|---|
| Publish | Deploy the app and its models for use. |
| Create Revision | Create a new revision of the app |
| Export | Download the app as a zip file. |
| Move | Move the app to a different workspace. |
| Refresh Relations | Reload all identity links between the apps models. |
| Unlock Models | Unlock all the models in the app |
| Select theme | Choose the color and icon to use for the app. |
| Export translations | Download a translations file. |
| Import translations | Upload a translations file. |
| Export variables | Export a summary of the variables |
| Remove | Removes the app. |
Adding FlowApp Pages
An app can also include Page models to provide custom dashboard and views. This kind of app is referred to as a FlowApp. To make a FlowApp you need to click the "Configure pages" button. This opens dialog to add Page models. A FlowApp can be navigated to directly if a FlowApp URL key is given.
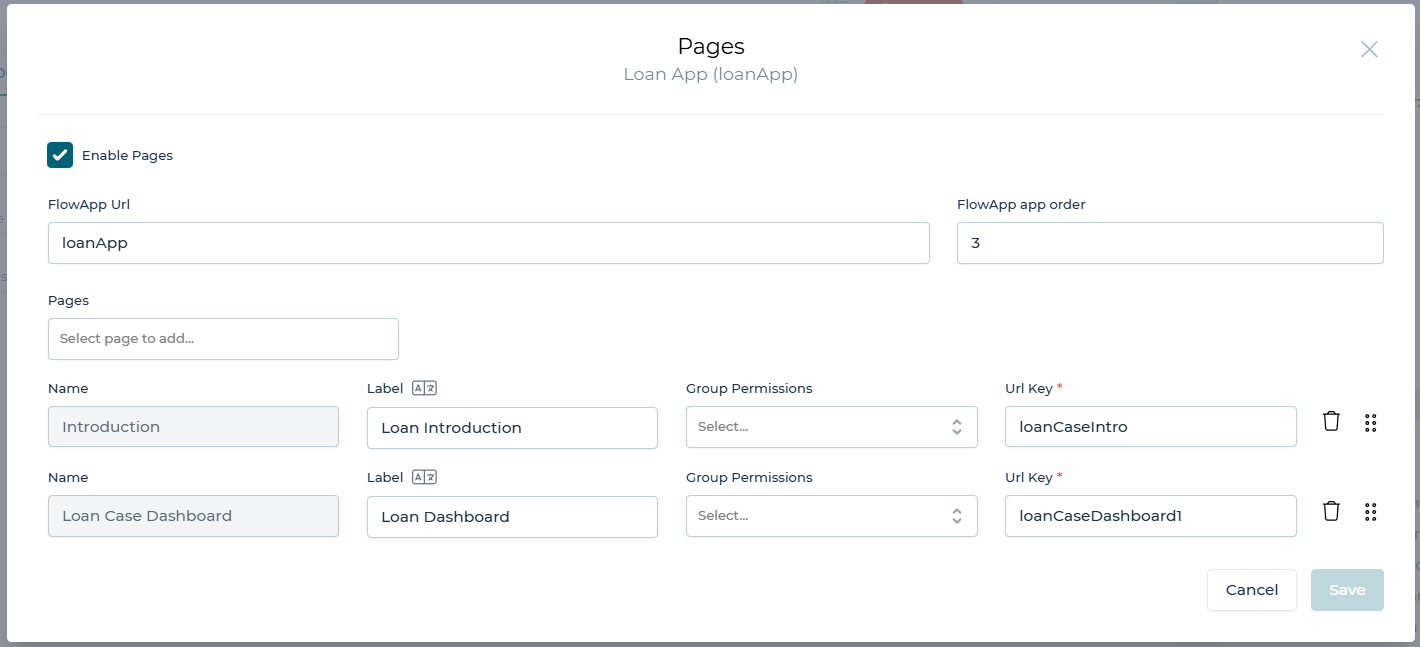
Under the Pages table is a dropdown menu that allows you to select a Page model to add. Pages are added to the table in the order they are added. The order of Pages is used by Flowable Work and Flowable Engage when displaying them, and up and down arrows allow you to reorder the Pages in the table. It is possible to change the label of a Page, so it can have a more application-specific display label. Each Page can also have a URL key that allows the individual Pages to be accessed directly by URL.
App Variables
v3.14.0+The Variables section allows you to define app variables. These variables can be used in all models for the app.
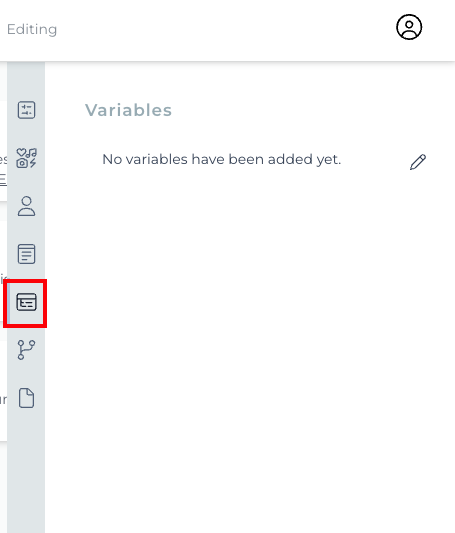
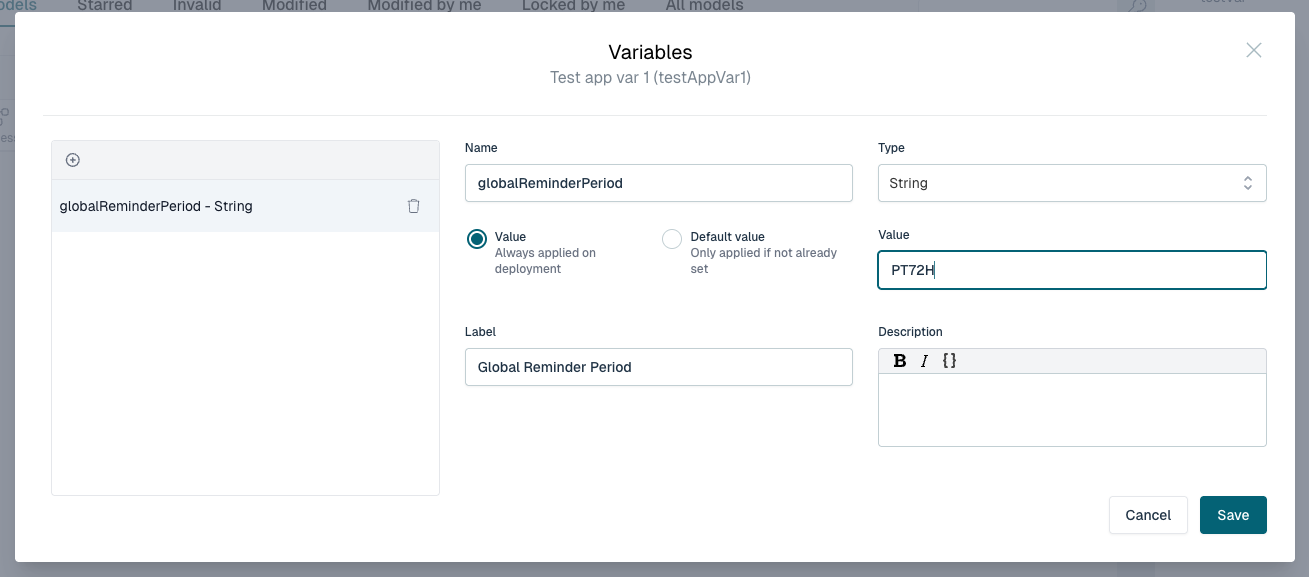 You can use the Edit button to add a new variable to the app and modify existing variables. The dialog allows you to define the variable's name, key, type and description.
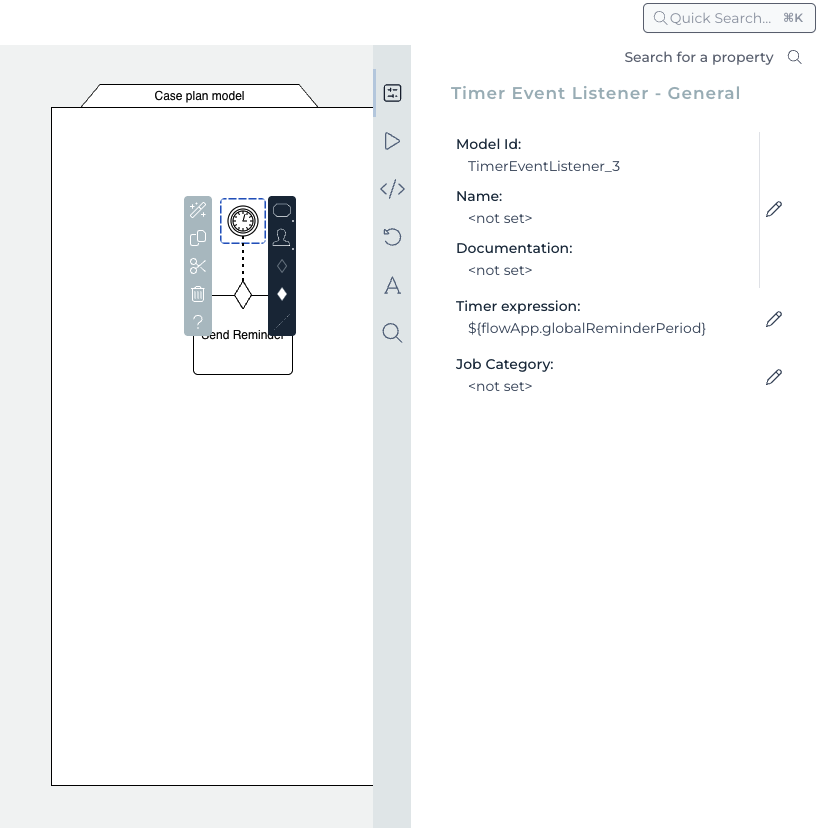 You can use the app variable in any expression, e.g.
 ${flowApp.globalReminderPeriod} to read the variable globalReminderPeriod. In this example, we use it to store a global auto reminder period. If we want to change that value for all our existing models, we can simply change it in one central place.
Value Mode
2026.1.0+Each app variable can be configured with one of two value modes:
| Mode | Description |
|---|---|
| Value | The variable is always overwritten on every (re-)deployment. This is the default behavior. |
| Default value | The variable is only set if it does not already exist. Runtime changes to the variable are preserved across re-deployments. This is useful when you want to define initial values for variables that can be changed at runtime without being reset on the next deployment. For example, a configuration variable like a reminder period can be adjusted by an administrator at runtime, and the adjusted value will be preserved when the app is re-deployed. |
noteIf a variable's type changes between deployments, the variable is always recreated regardless of the selected value mode.
App Revisions
v3.16.0+A revision is a snapshot of the app at a specific point in time. You can create as many revisions as you want and can always revert to an older version if needed.

You can do multiple actions on a revision:
- Revert to this revision: Restores the app to the state it was in when this revision was created.
- Copy into workspace: Copies the revision into a different workspace.
- Publish: Deploys the revision to the runtime engine.
- About: Shows information about the revision.
- Download: Downloads the revision as a zip file.
- Delete: Deletes the revision.
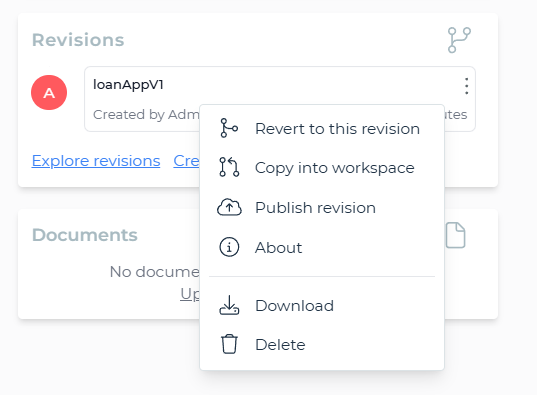
noteReverting a revision will only revert the app in Flowable Design. If the app has been published, the revision will not be reverted in the runtime engine.
For more information on revisions, watch our YouTube video
Viewing a revision
2026.1.0+Each revision keeps a full snapshot of the app as it was when the revision was created. The actions available for a revision can be opened from its menu in the Revisions section of the app overview.
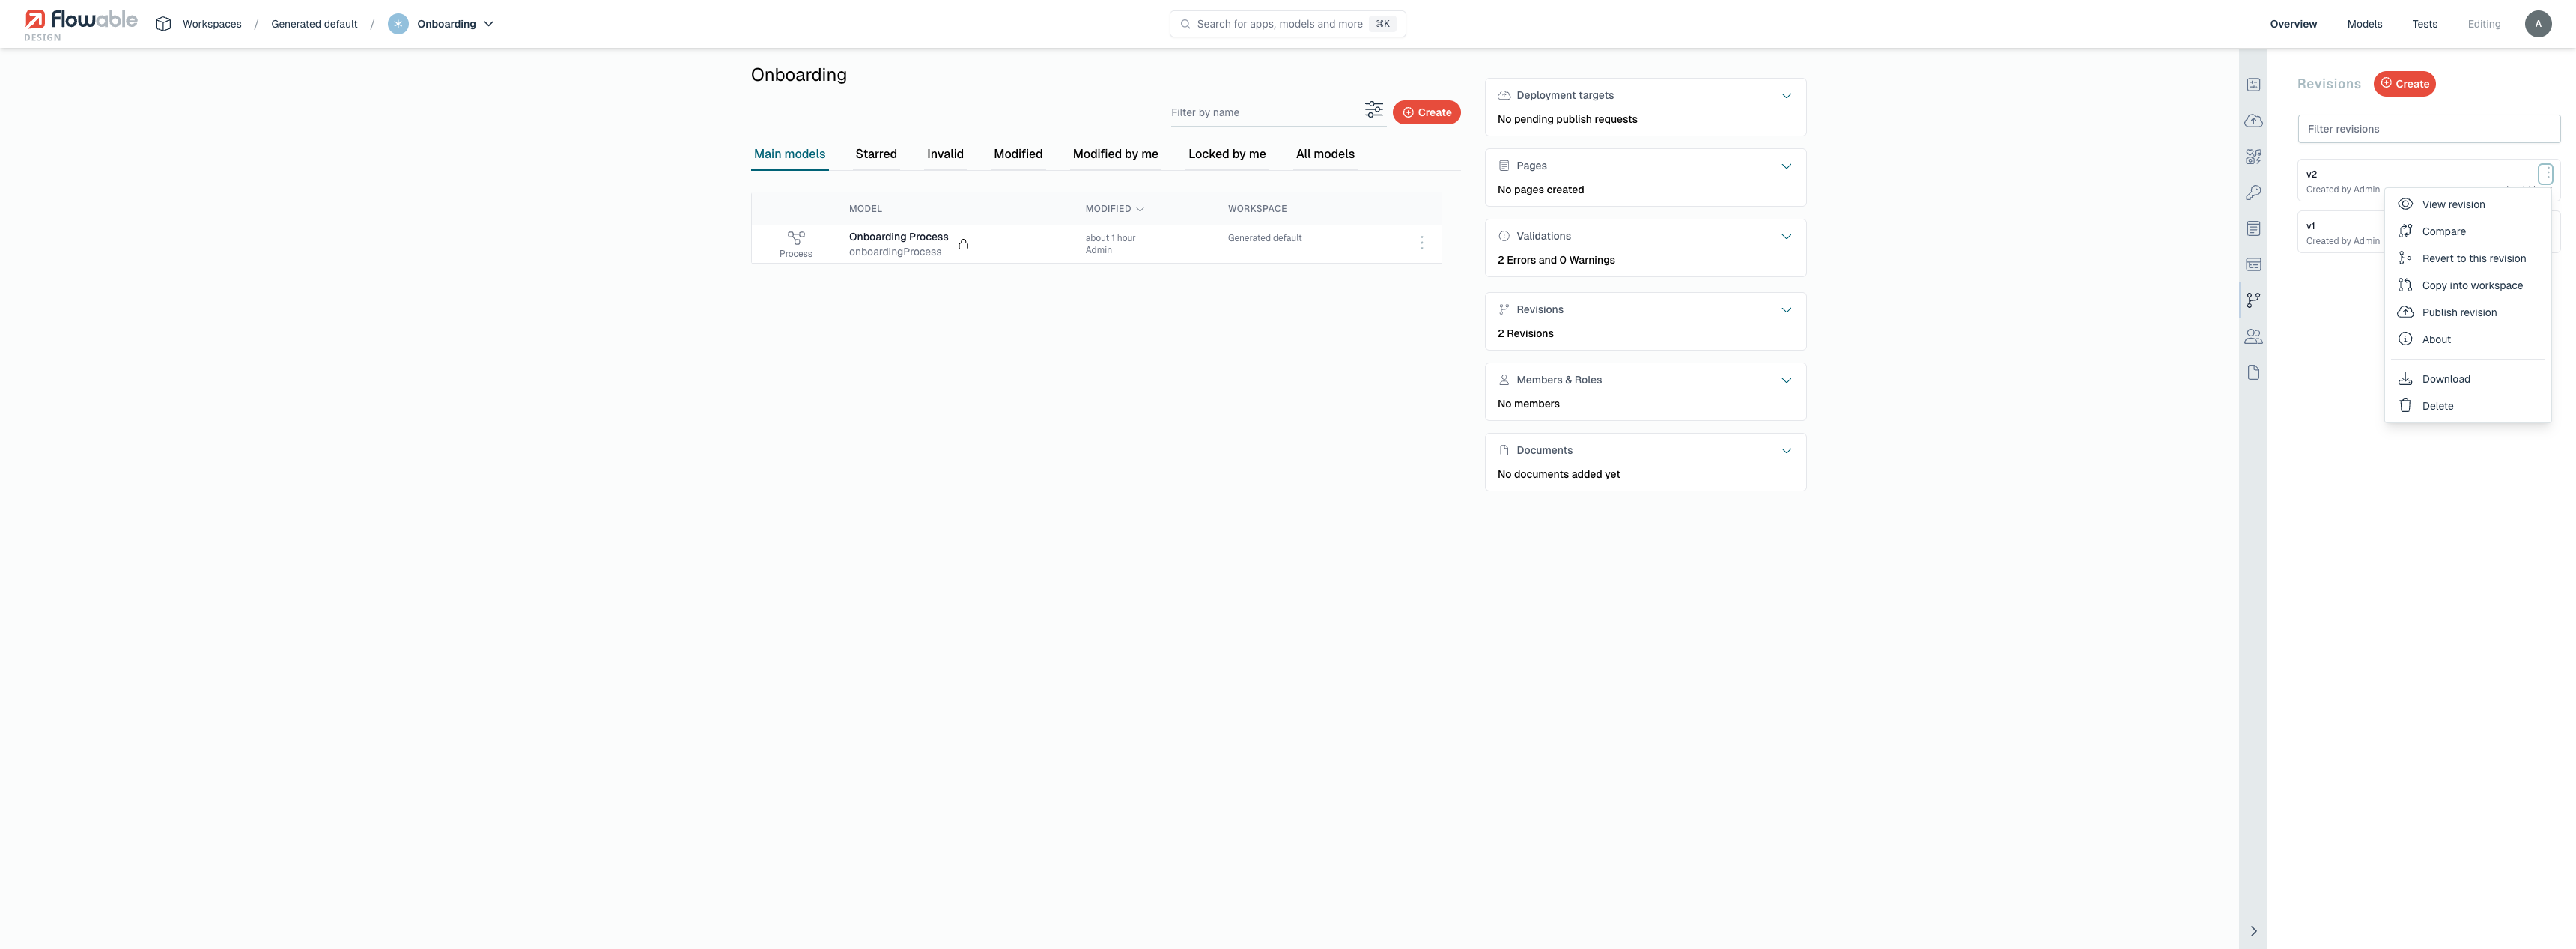
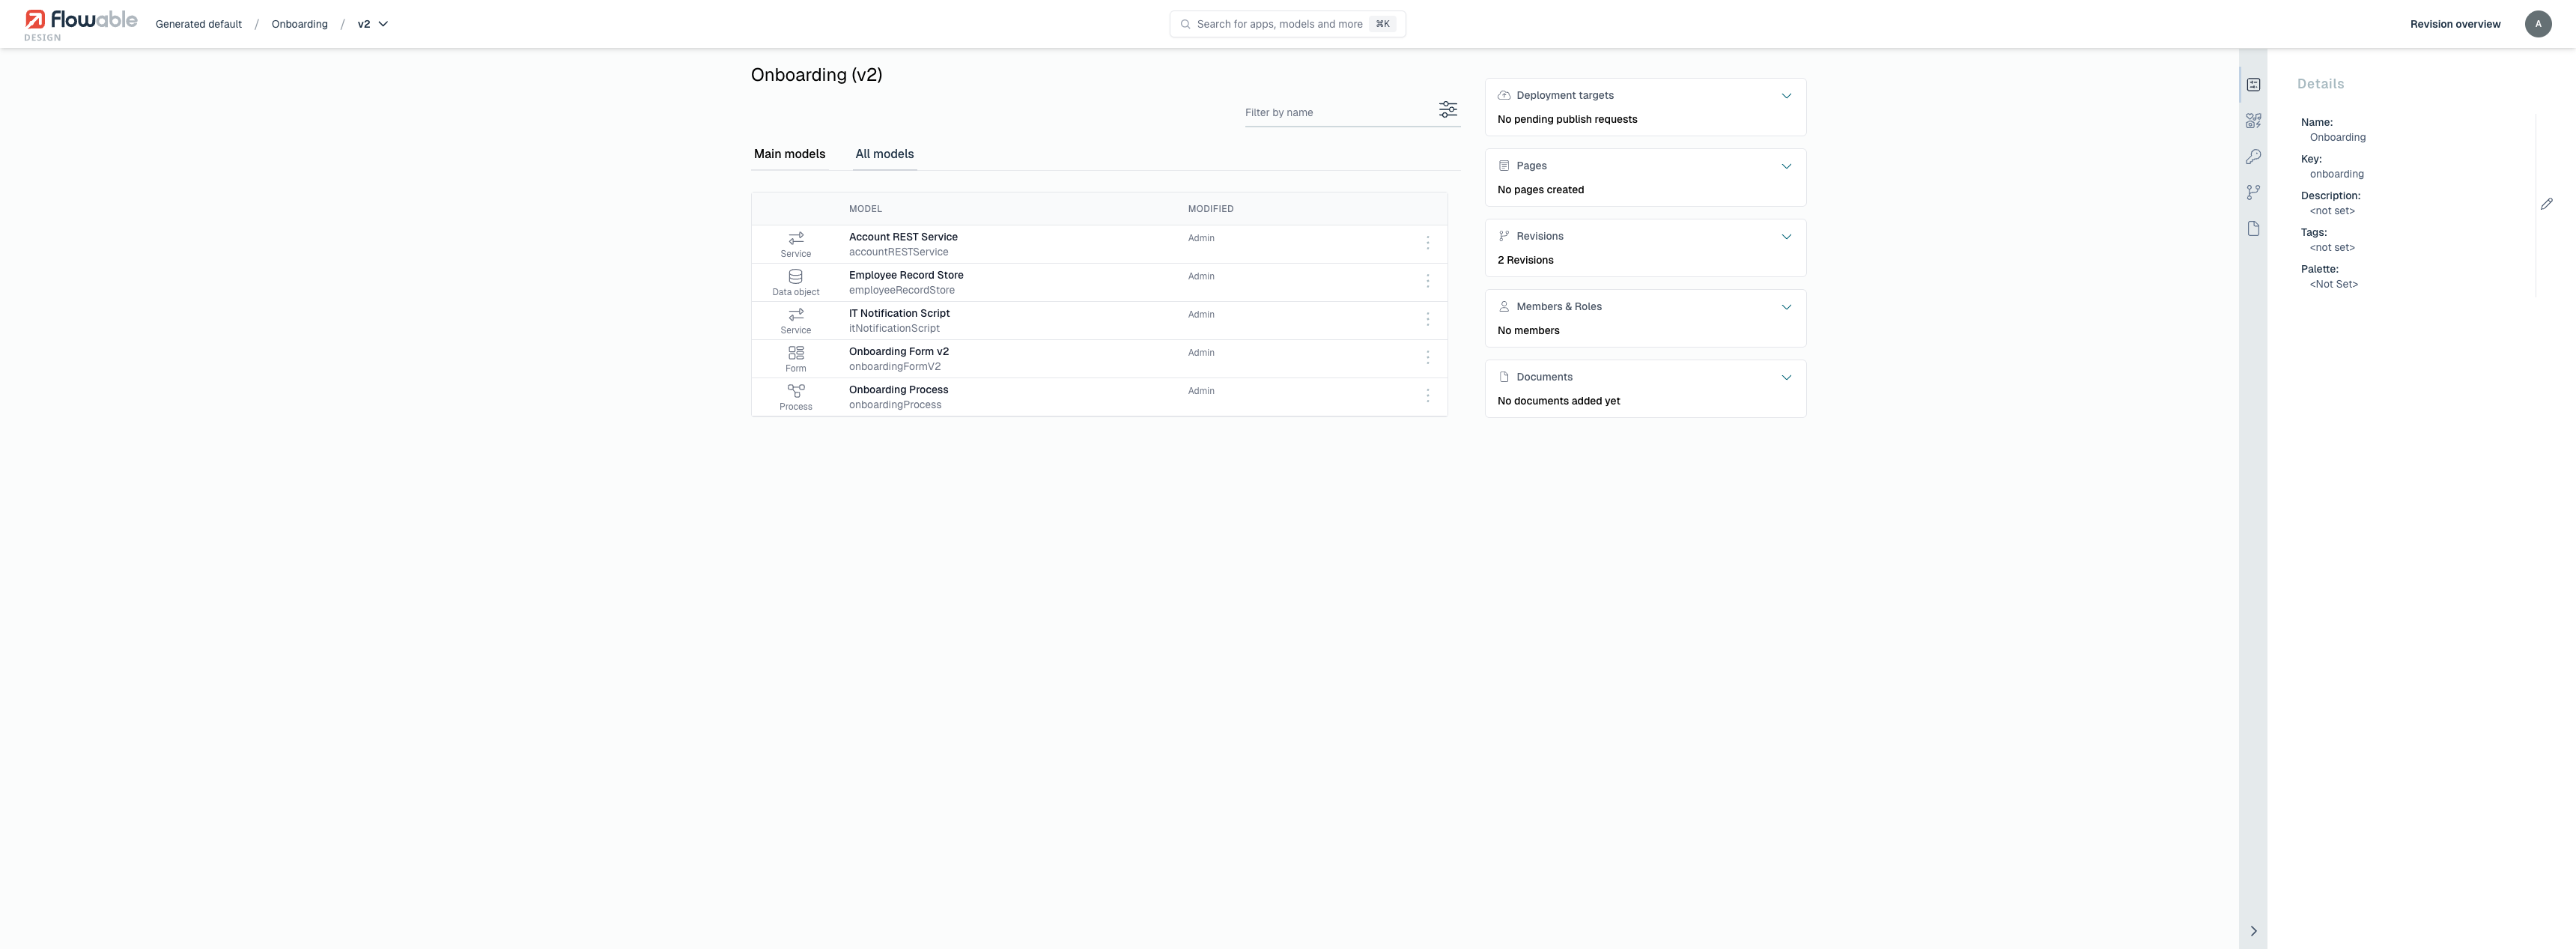
The View revision action opens the Revision overview — a read-only view of the app at that revision. It looks like the app overview, but reflects the snapshot rather than the current working version: the app details, deployment targets, pages and members as they were, and the models the revision contains. Use the Main models and All models tabs to browse the contained models, and the Filter by name field to search them.
Comparing app revisions
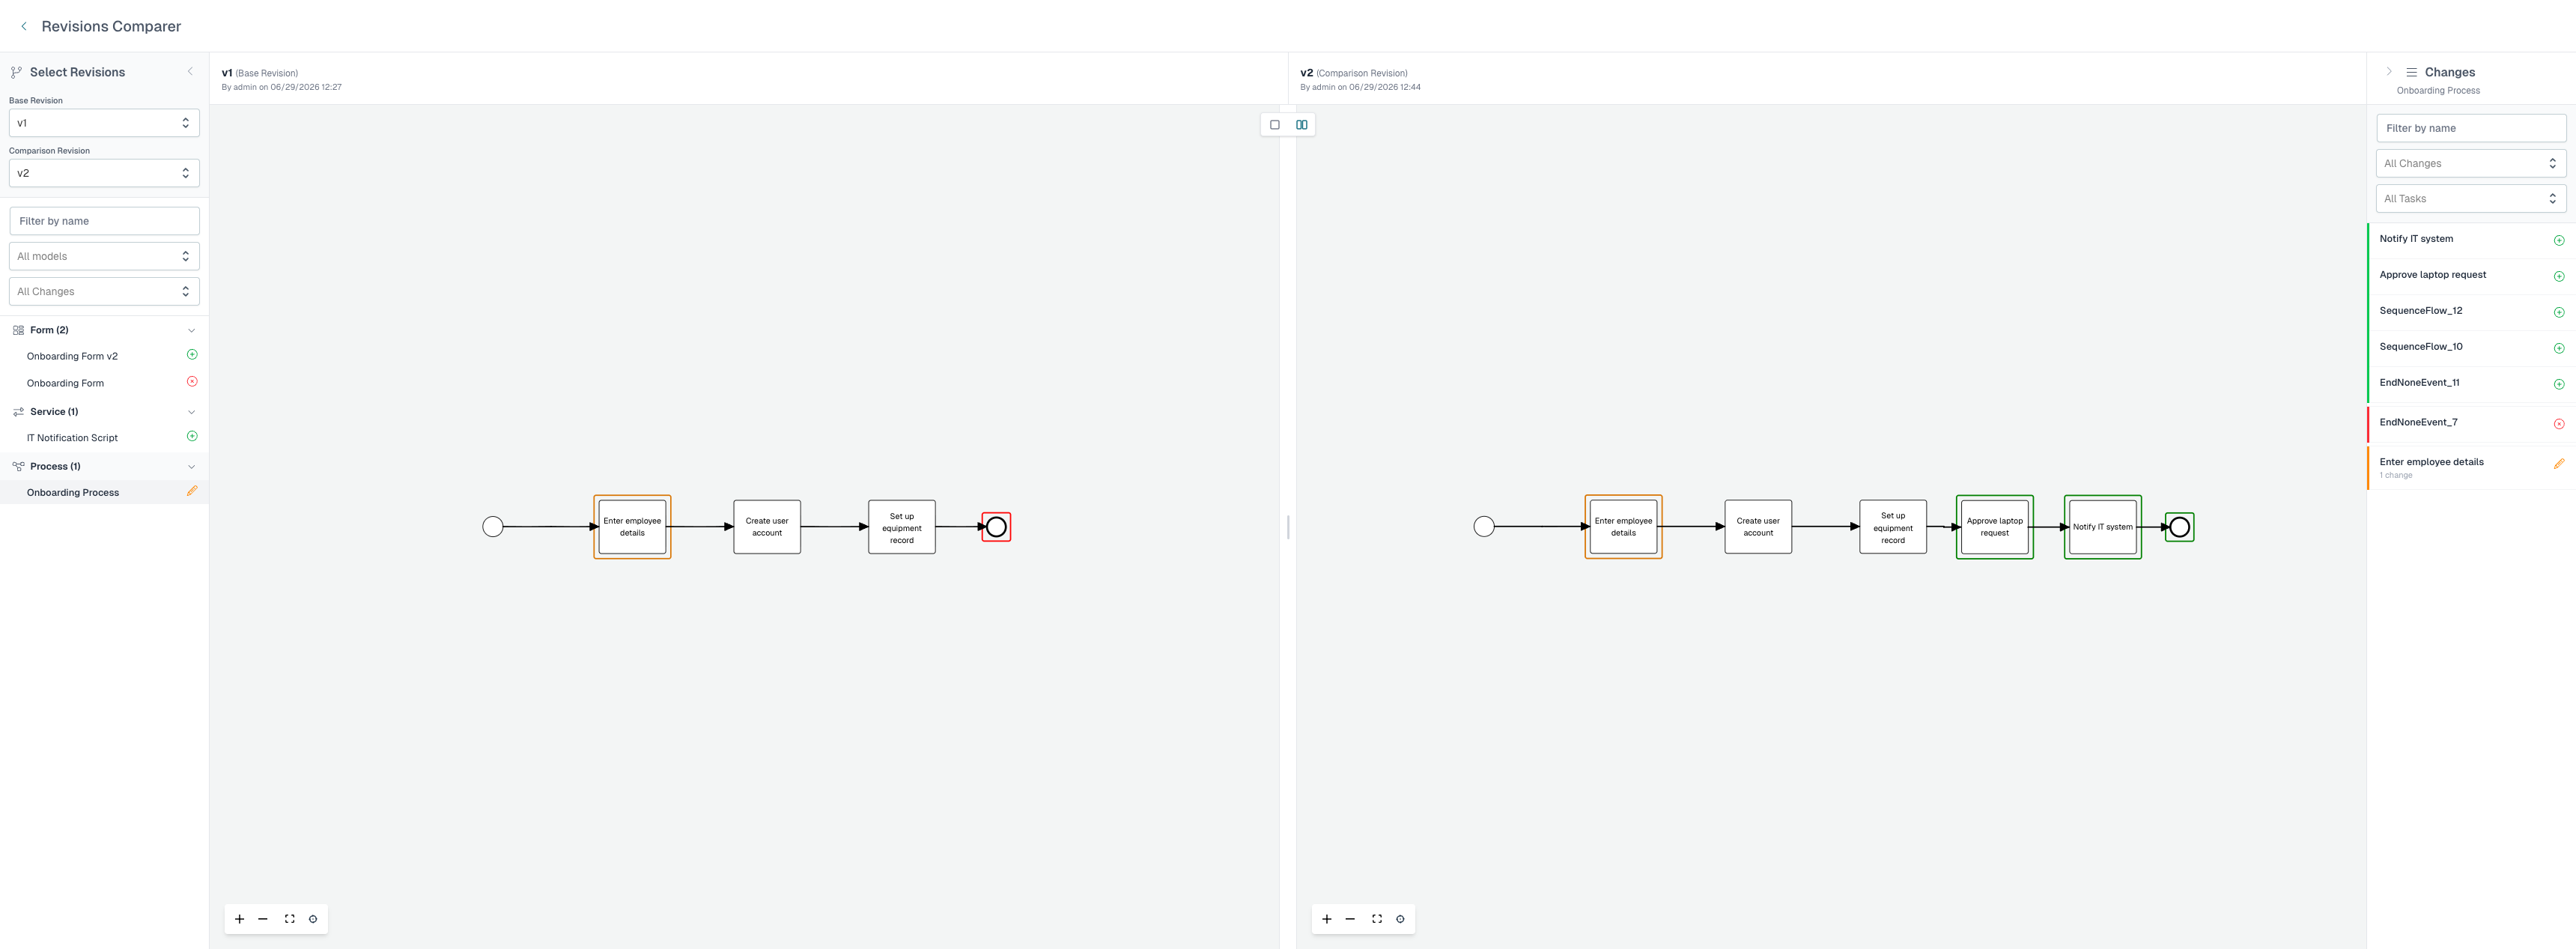
2026.1.0+The Revisions Comparer lets you compare two revisions of an app side by side to see exactly what changed between them. You can open it from the Revisions section of the app overview, either through the Explore revisions link or the Compare action on a revision.
In the comparer you select a Base Revision and a Comparison Revision. The left panel then lists every model in the two revisions, grouped by model type and marked with its change status relative to the base revision:
- A green plus icon marks a model that was added.
- A red cross icon marks a model that was deleted.
- A yellow pencil icon marks a model that was modified.
Models that are unchanged are listed without an icon. You can narrow the list with the Filter by name field and the model-type and change-type filters.
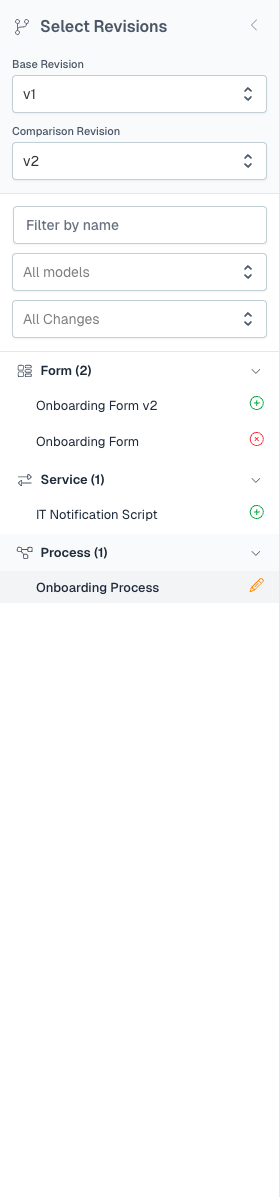
Selecting a model opens it in both revisions side by side — the base revision on the left and the comparison revision on the right — so you can see the change in context. For diagram models such as processes, the two diagrams are shown next to each other with the changed elements highlighted: added elements have a green border, deleted elements a red border and modified elements a yellow border.
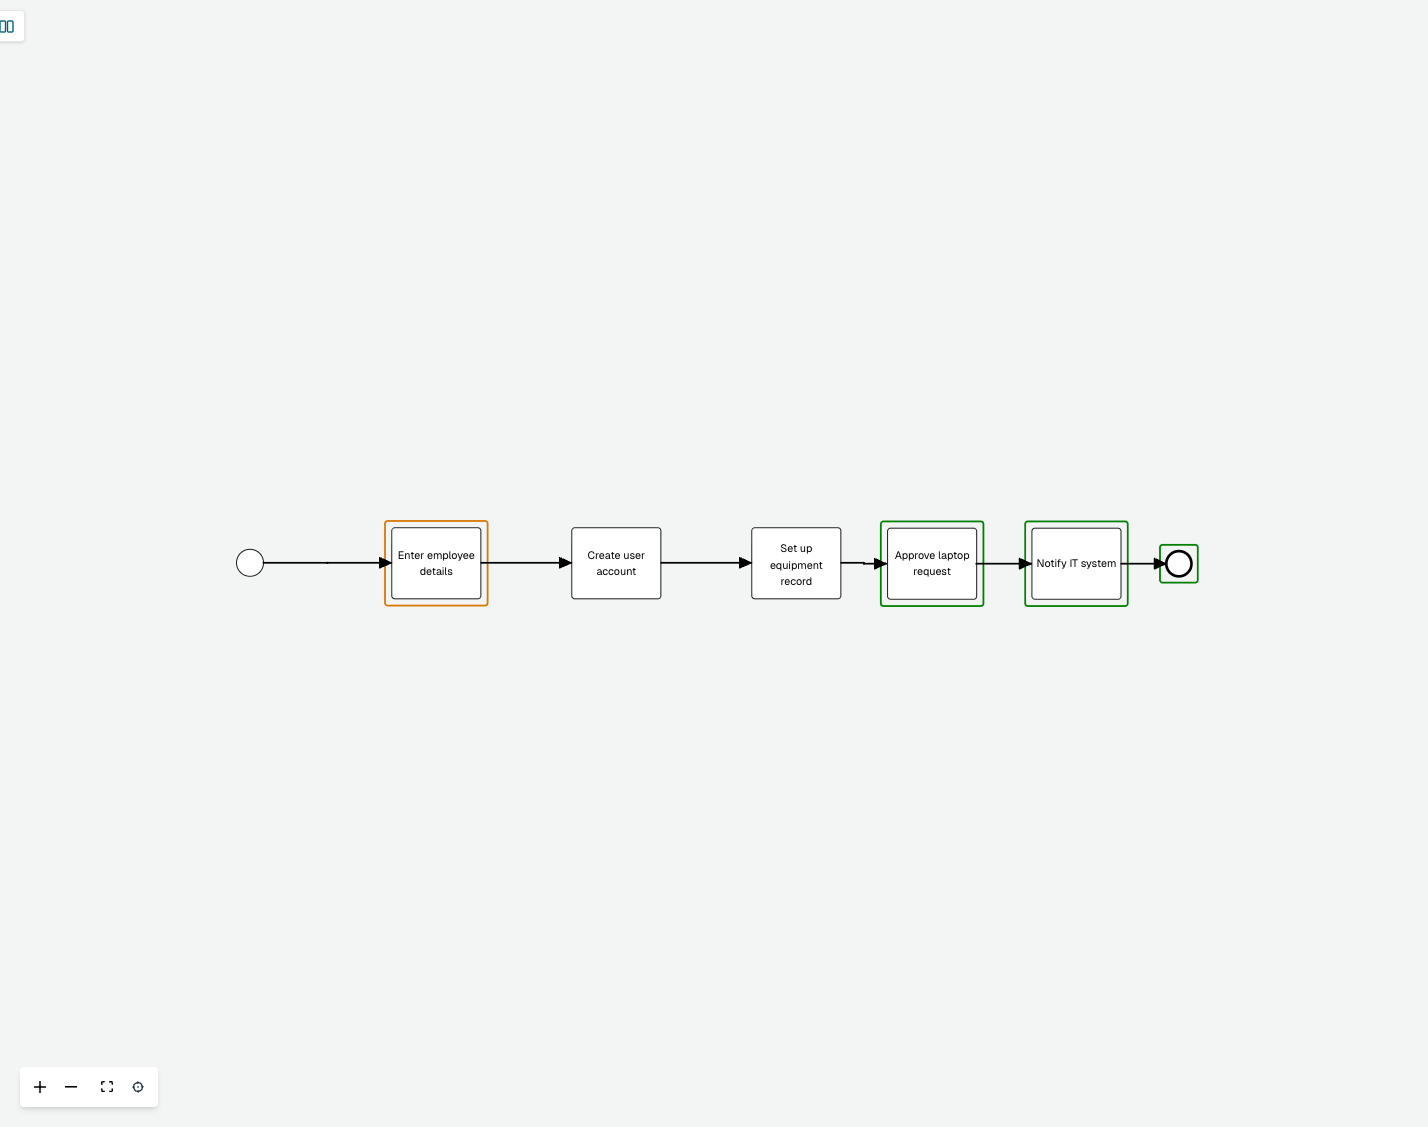
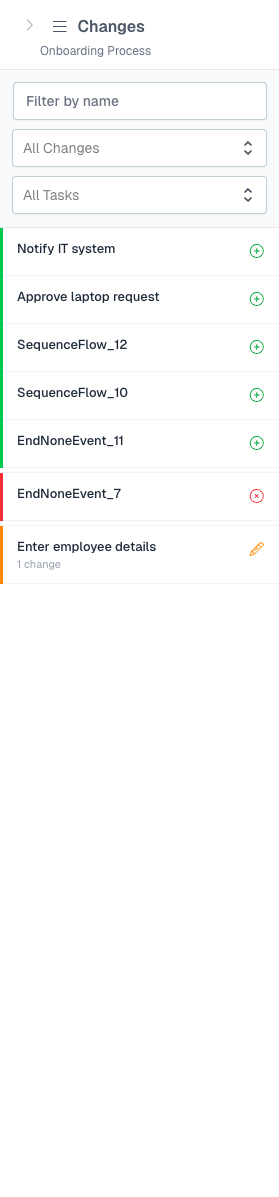
The Changes panel on the right lists the individual changes for the selected model — each added, deleted or modified element — using the same colour coding, so you can review the differences element by element.
App members and roles
2026.1.0+In addition to the workspace-level permissions, each app can have its own members — the users and groups that are allowed to work on the app in Flowable Design, each with an assigned role. This is separate from the Permissions section described above, which controls who may access the deployed app at runtime: app members and roles govern who can view and edit the app within Flowable Design.
App members and roles are additive to the workspace permissions: a member's effective access is the combination of what they are granted on the workspace and what they are granted on the app. This lets you grant broader rights on a single app than a user has on the workspace as a whole. For example, a user with only read access to a workspace can be given a dedicated editing role on a selected app, allowing them to edit that one app while keeping read-only access to the rest of the workspace.
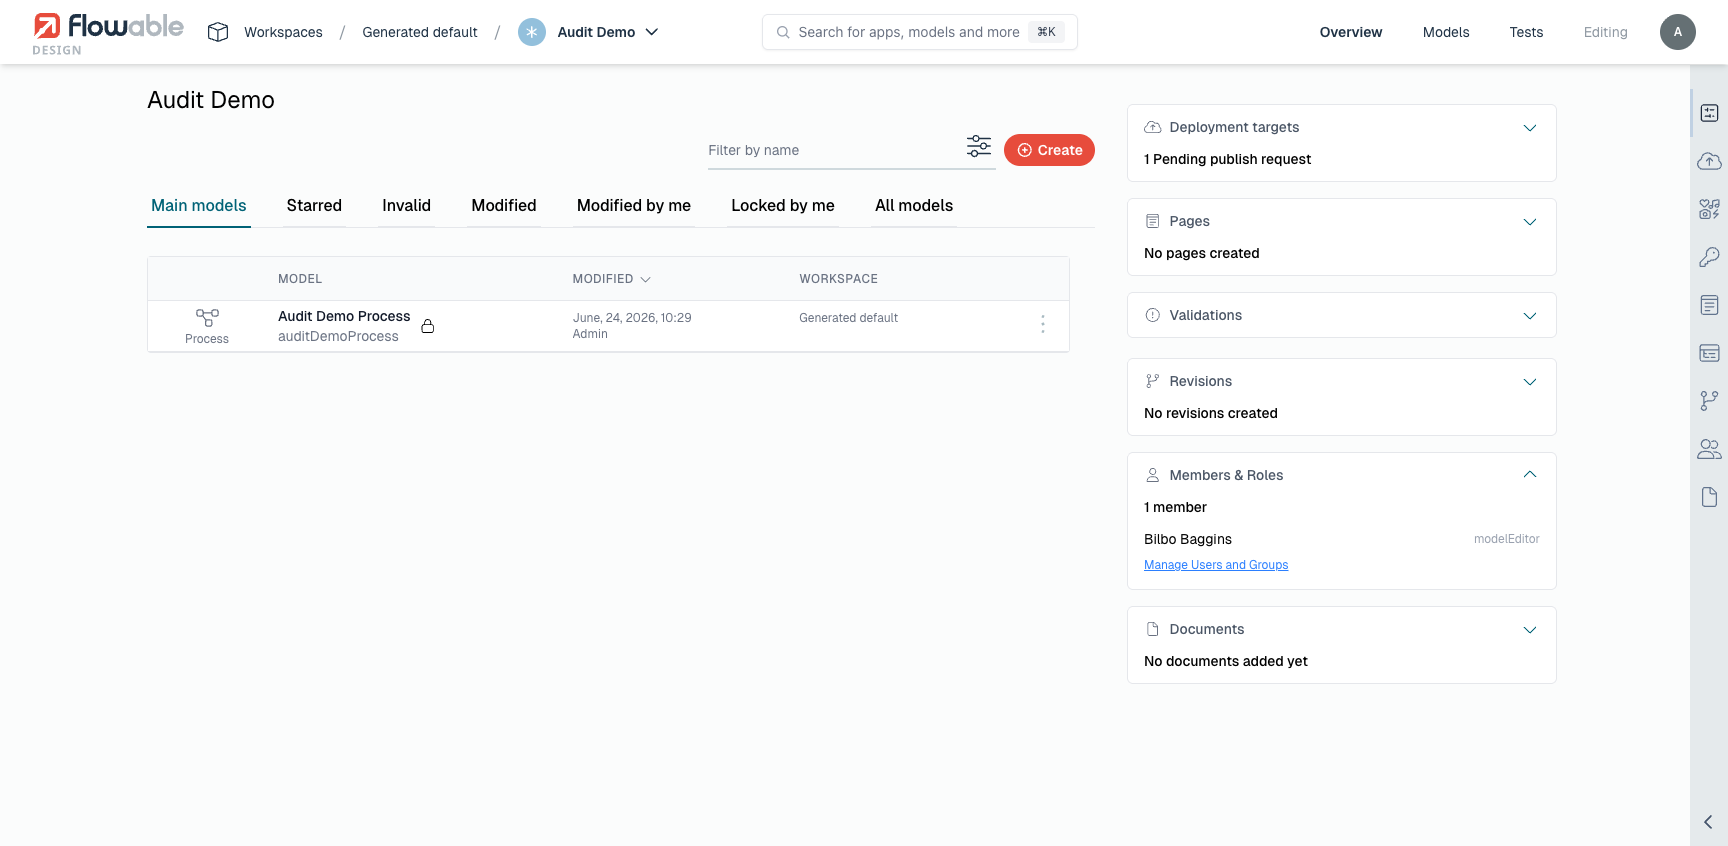
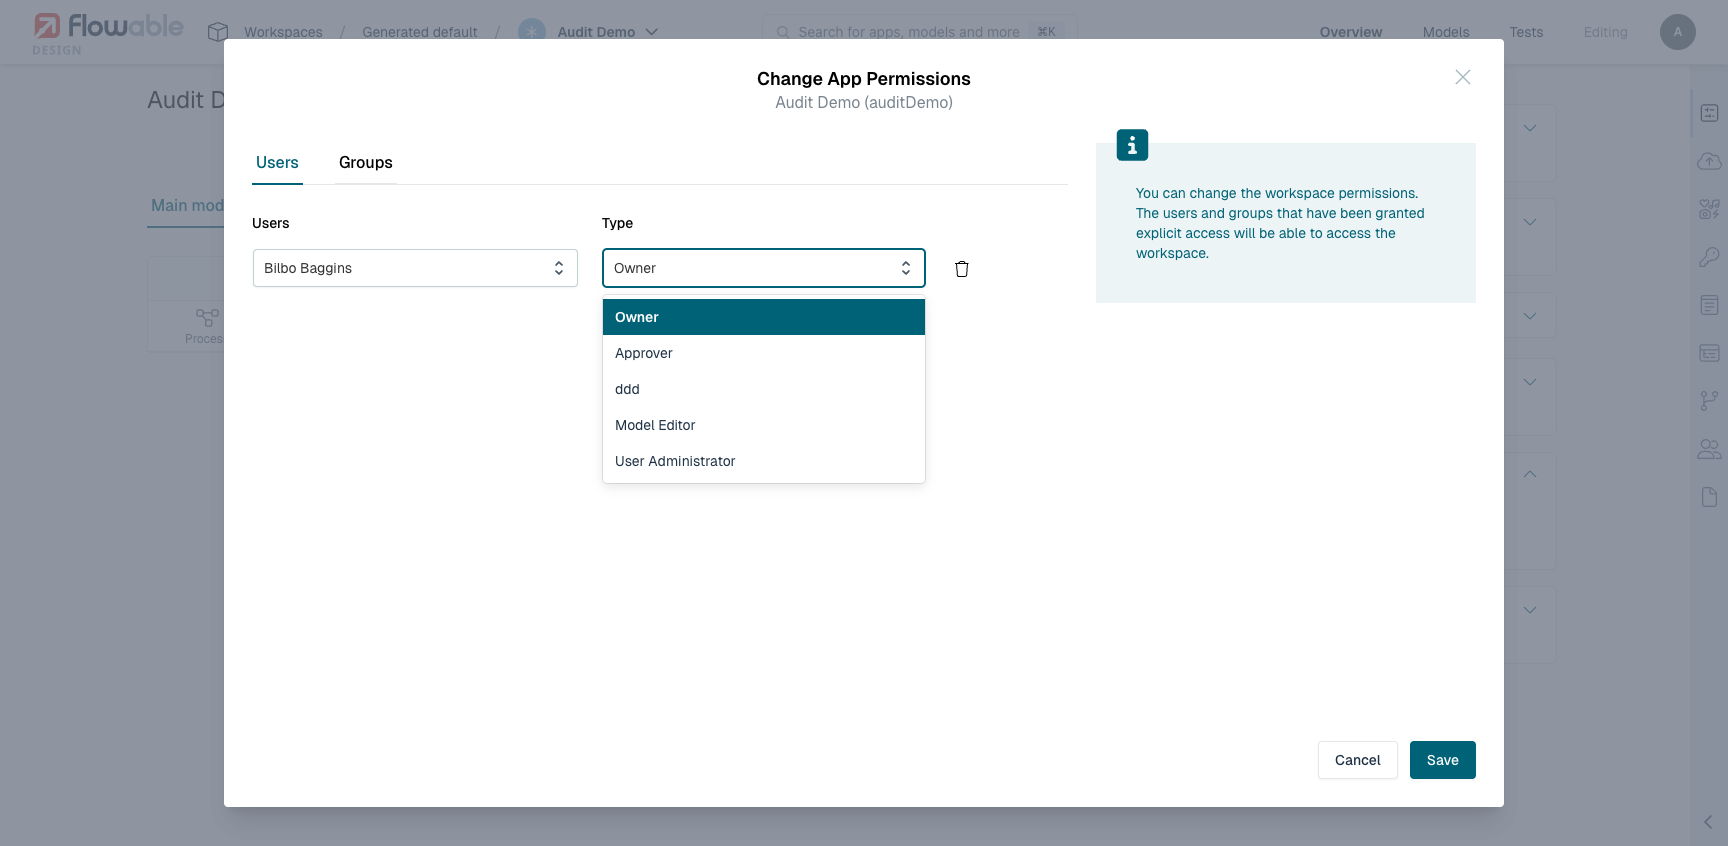
The current members are listed in the Members & Roles section of the app overview. Click Manage Users and Groups to open the Change App Permissions dialog.
The dialog has separate Users and Groups tabs. Use the Add button to add a row, select the user or group, and choose its role from the Type dropdown. The role list contains the built-in roles (such as Owner, Approver and Model Editor) as well as any custom scoped roles defined for your tenant. Use the delete icon next to a row to remove a member, and click Save to apply your changes.
Refreshing App Relations
v3.17.0+When clicking the Refresh relations button all model relations for the app will be re-calculated and stored. This action is typically used when you encounter issues with model relations.
Move Apps
v3.17.0+You can use the Move App action on the app to move it to a different workspace. This is useful if you have created an app in the wrong workspace or need to move it to a different workspace for any reason. The move will also include the history of the models, the variables, revisions etc. Similar to the Import app action, there are advanced options that define how to handle the move in case there are already existing models with the same key in the target workspace. That is called a clash. The options available equal to the move.
A conflict occurs when a model that is a direct child of your application is linked to other models that are not directly part of your application, or if a model from a different application is referencing a model that is part of your application. In both cases the move models will not be moved, but copied instead.
noteAs soon as a clash occurs, no history is available for that particular model. The app revision will also be lost. In case of a conflict, the app will still contain its revision after moving, however there will be no model history for the conflicted model.
App move and shared workspaces/models
With shared workspaces, Flowable introduced an easy to allow access models across different workspaces. This means that models can be shared between apps of different workspaces. When moving an app to a different workspace, the usage of shared models can lead to multiple scenarios:
- Both workspaces share the same workspace -> that is no problem at all. While moving a model, we do not need to move or copy models from the shared workspace.
- Both workspaces have a different shared workspace -> You need to run the move with Copy conflicted models from the shared workspace option. Be aware that this will copy the models from the shared workspace to the target workspace.
App Models
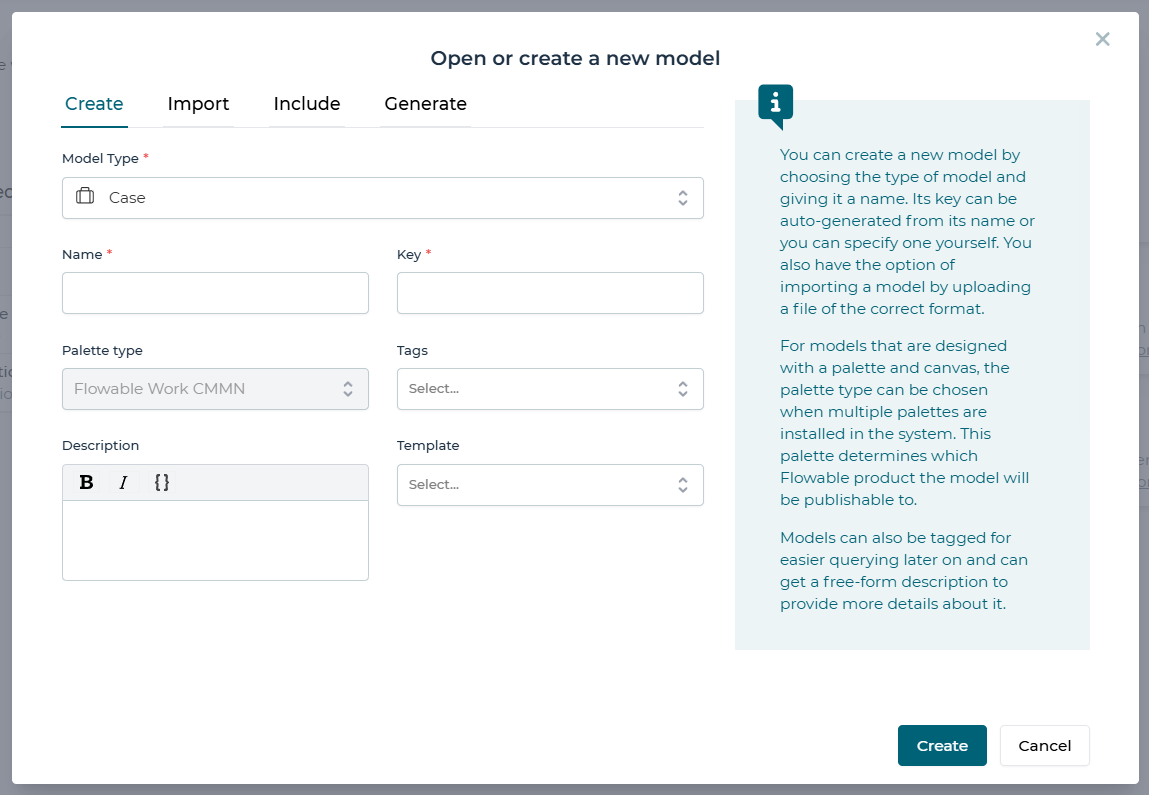
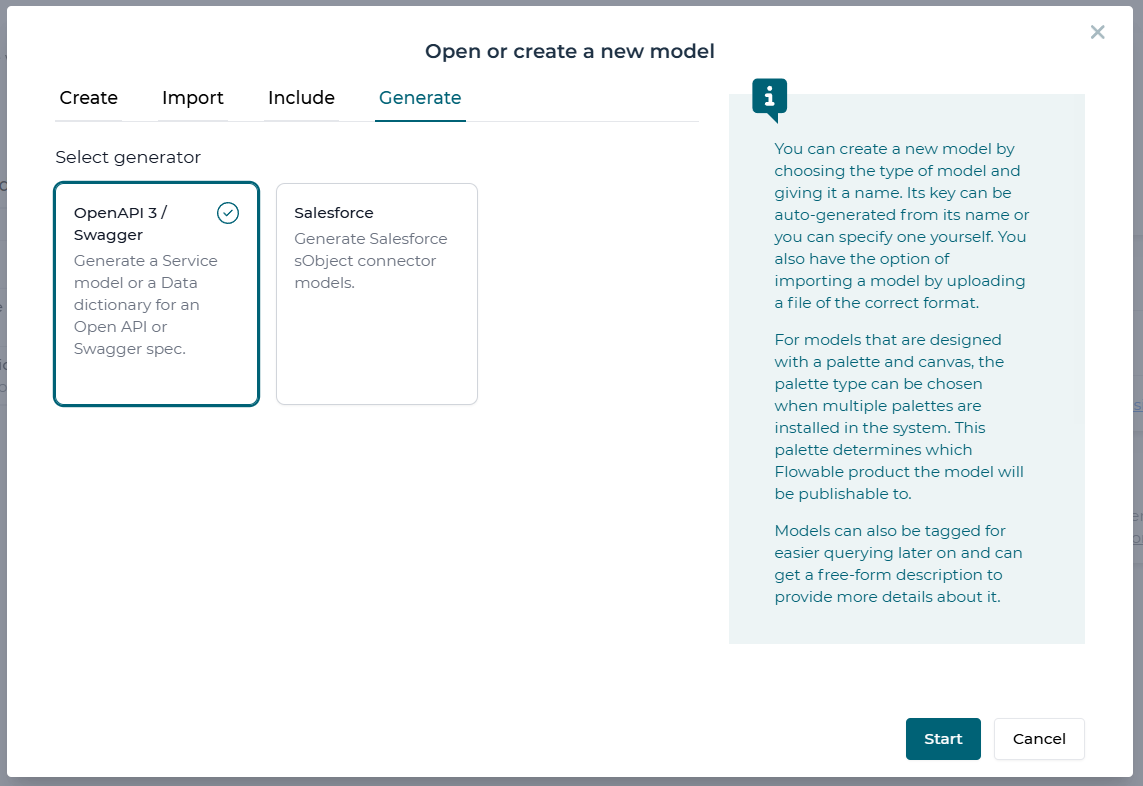
To add models to an app, click on the + Create button. This opens a dialog that allows you to choose how you want to add a model to the app: by creating a new one from scratch, importing one from a file, including a model already created in another app, or generate a model from external sources
Creating a new model is the default selection. You can choose the type, name, key, description, tags of the model you want to create and then click the Create button to create the model.
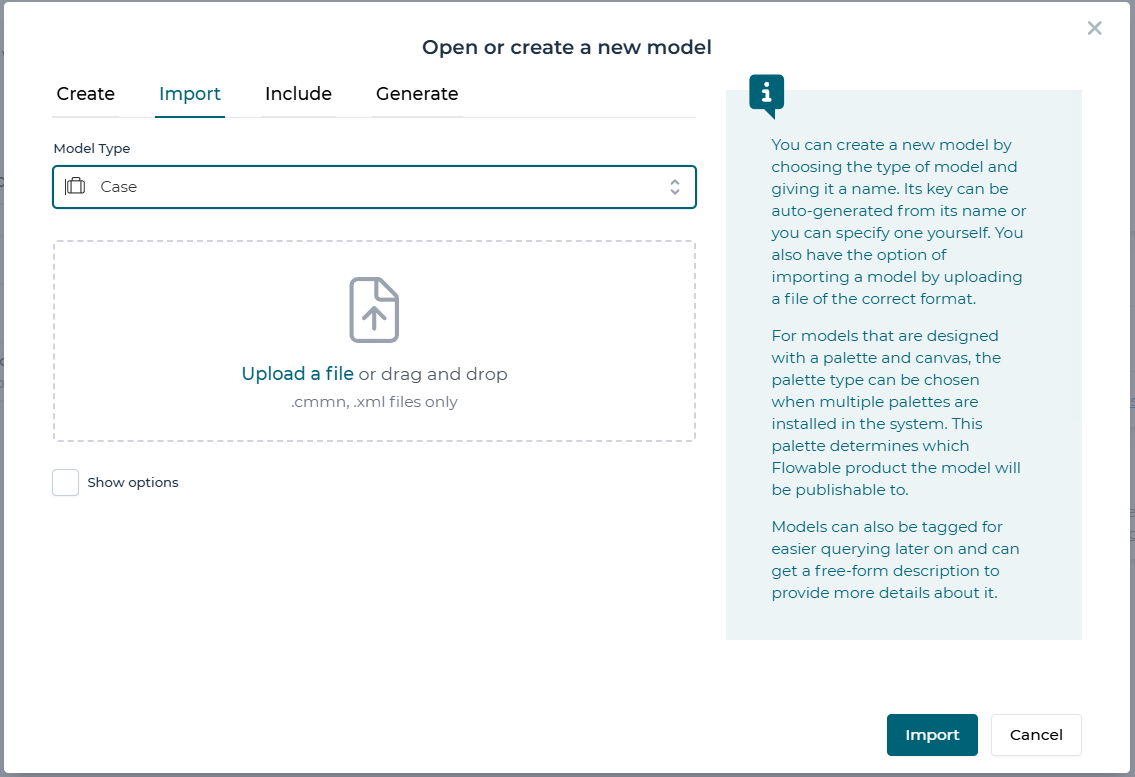
You can import a model from a file by selecting the Import option. This displays a form that prompts you to select the type and a file to import.
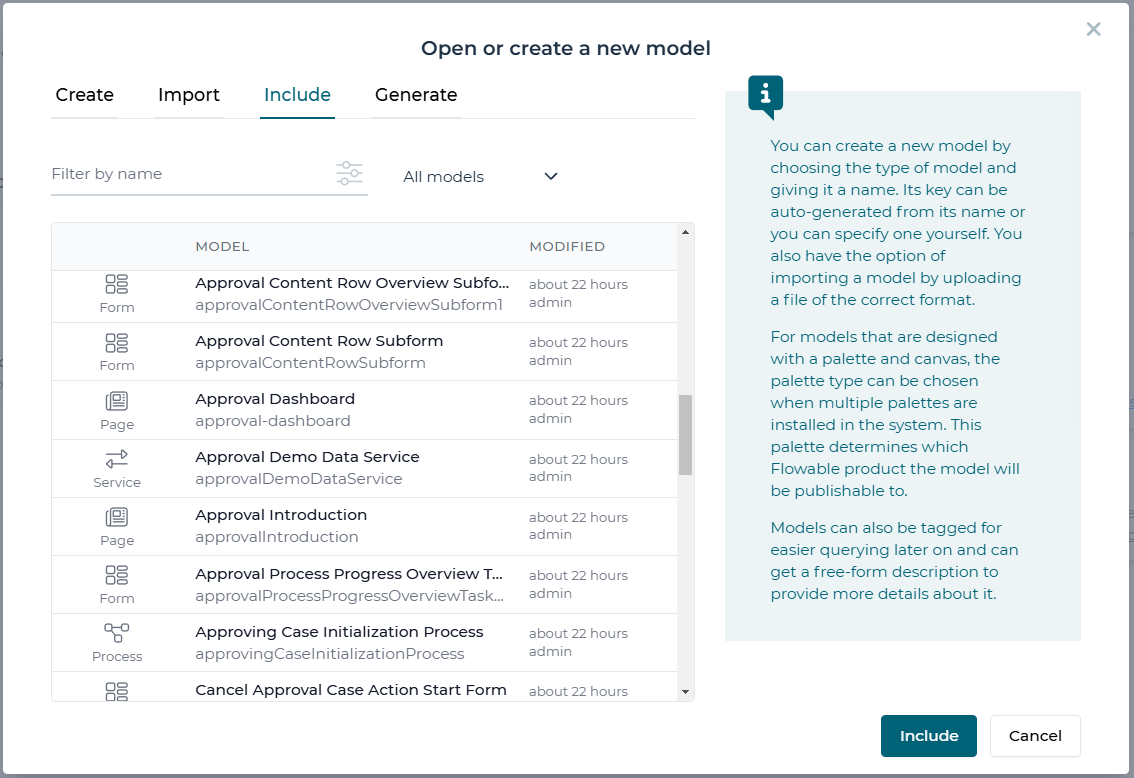
If you chose to include existing models to your app, you will be shown a form with a list of available models. Simply click on any model you want to include and confirm with Include.
Please be aware that it is not necessary to add models which are referenced in another model. For instance, if you wish to add a process model which contains a User Task referencing a form, you do not have to add that form to your app's models manually. However, you do have to add the process or case model itself. In the app view, you can see the linked models shown along with those you added explicitly. If the border around a model is dark blue, it means it was added explicitly, otherwise it was included by reference (linked).
If you want to remove a model from an app, from the app view on the model list you will be able to select a trash icon on any explicitly added models. Referenced (linked) models will disappear if the model that references them is removed or uses a different referenced model.
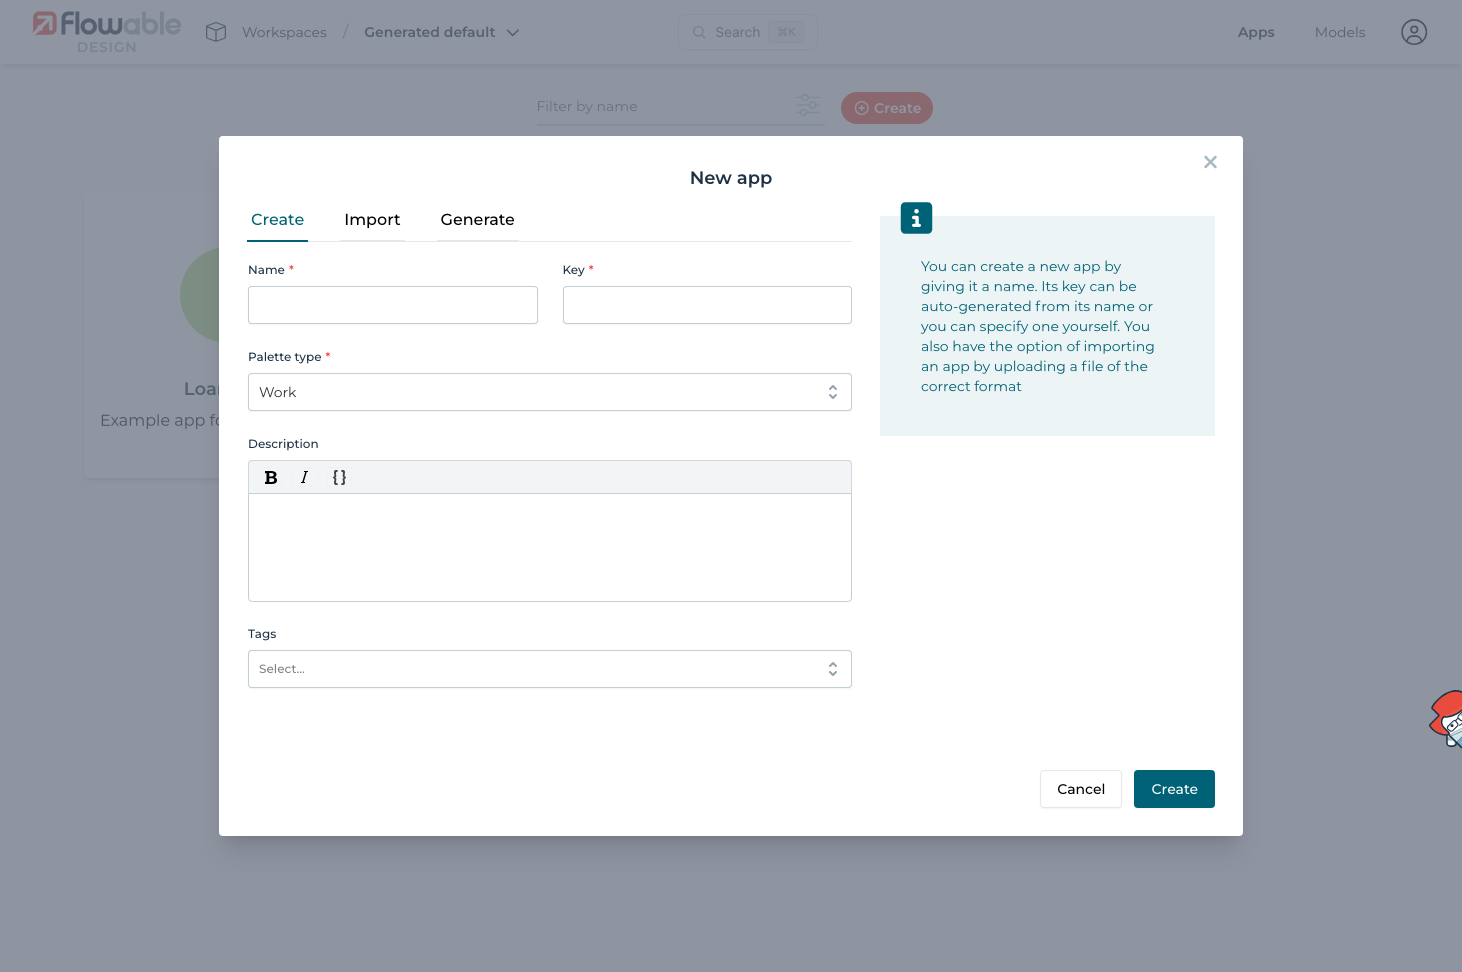
If you choose the Generate approach, you can select the following options:
Model Usage
The Model usage view shows the relationships between a model and the other models in your workspace: both the models it uses and the models that use it. This makes it easy to understand the impact of a change before you make it. For example, you can see which processes, cases and forms call a service before you change one of its operations.
You can open it in two ways:
- From a model's actions menu in the app or workspace model list, select Usage.
- From the toolbar of an open model, click the Usage button.
The view opens in a Model usage dialog with two tabs:
- Uses: the models that the selected model references. For example, a process lists the forms, decisions and services it calls.
- Used by: the models that reference the selected model. For example, a service registry model lists every process, case, form and page that calls it.
Relations are grouped by app and then by model type. Use the Filter by name field or the model type dropdown to narrow down large lists.
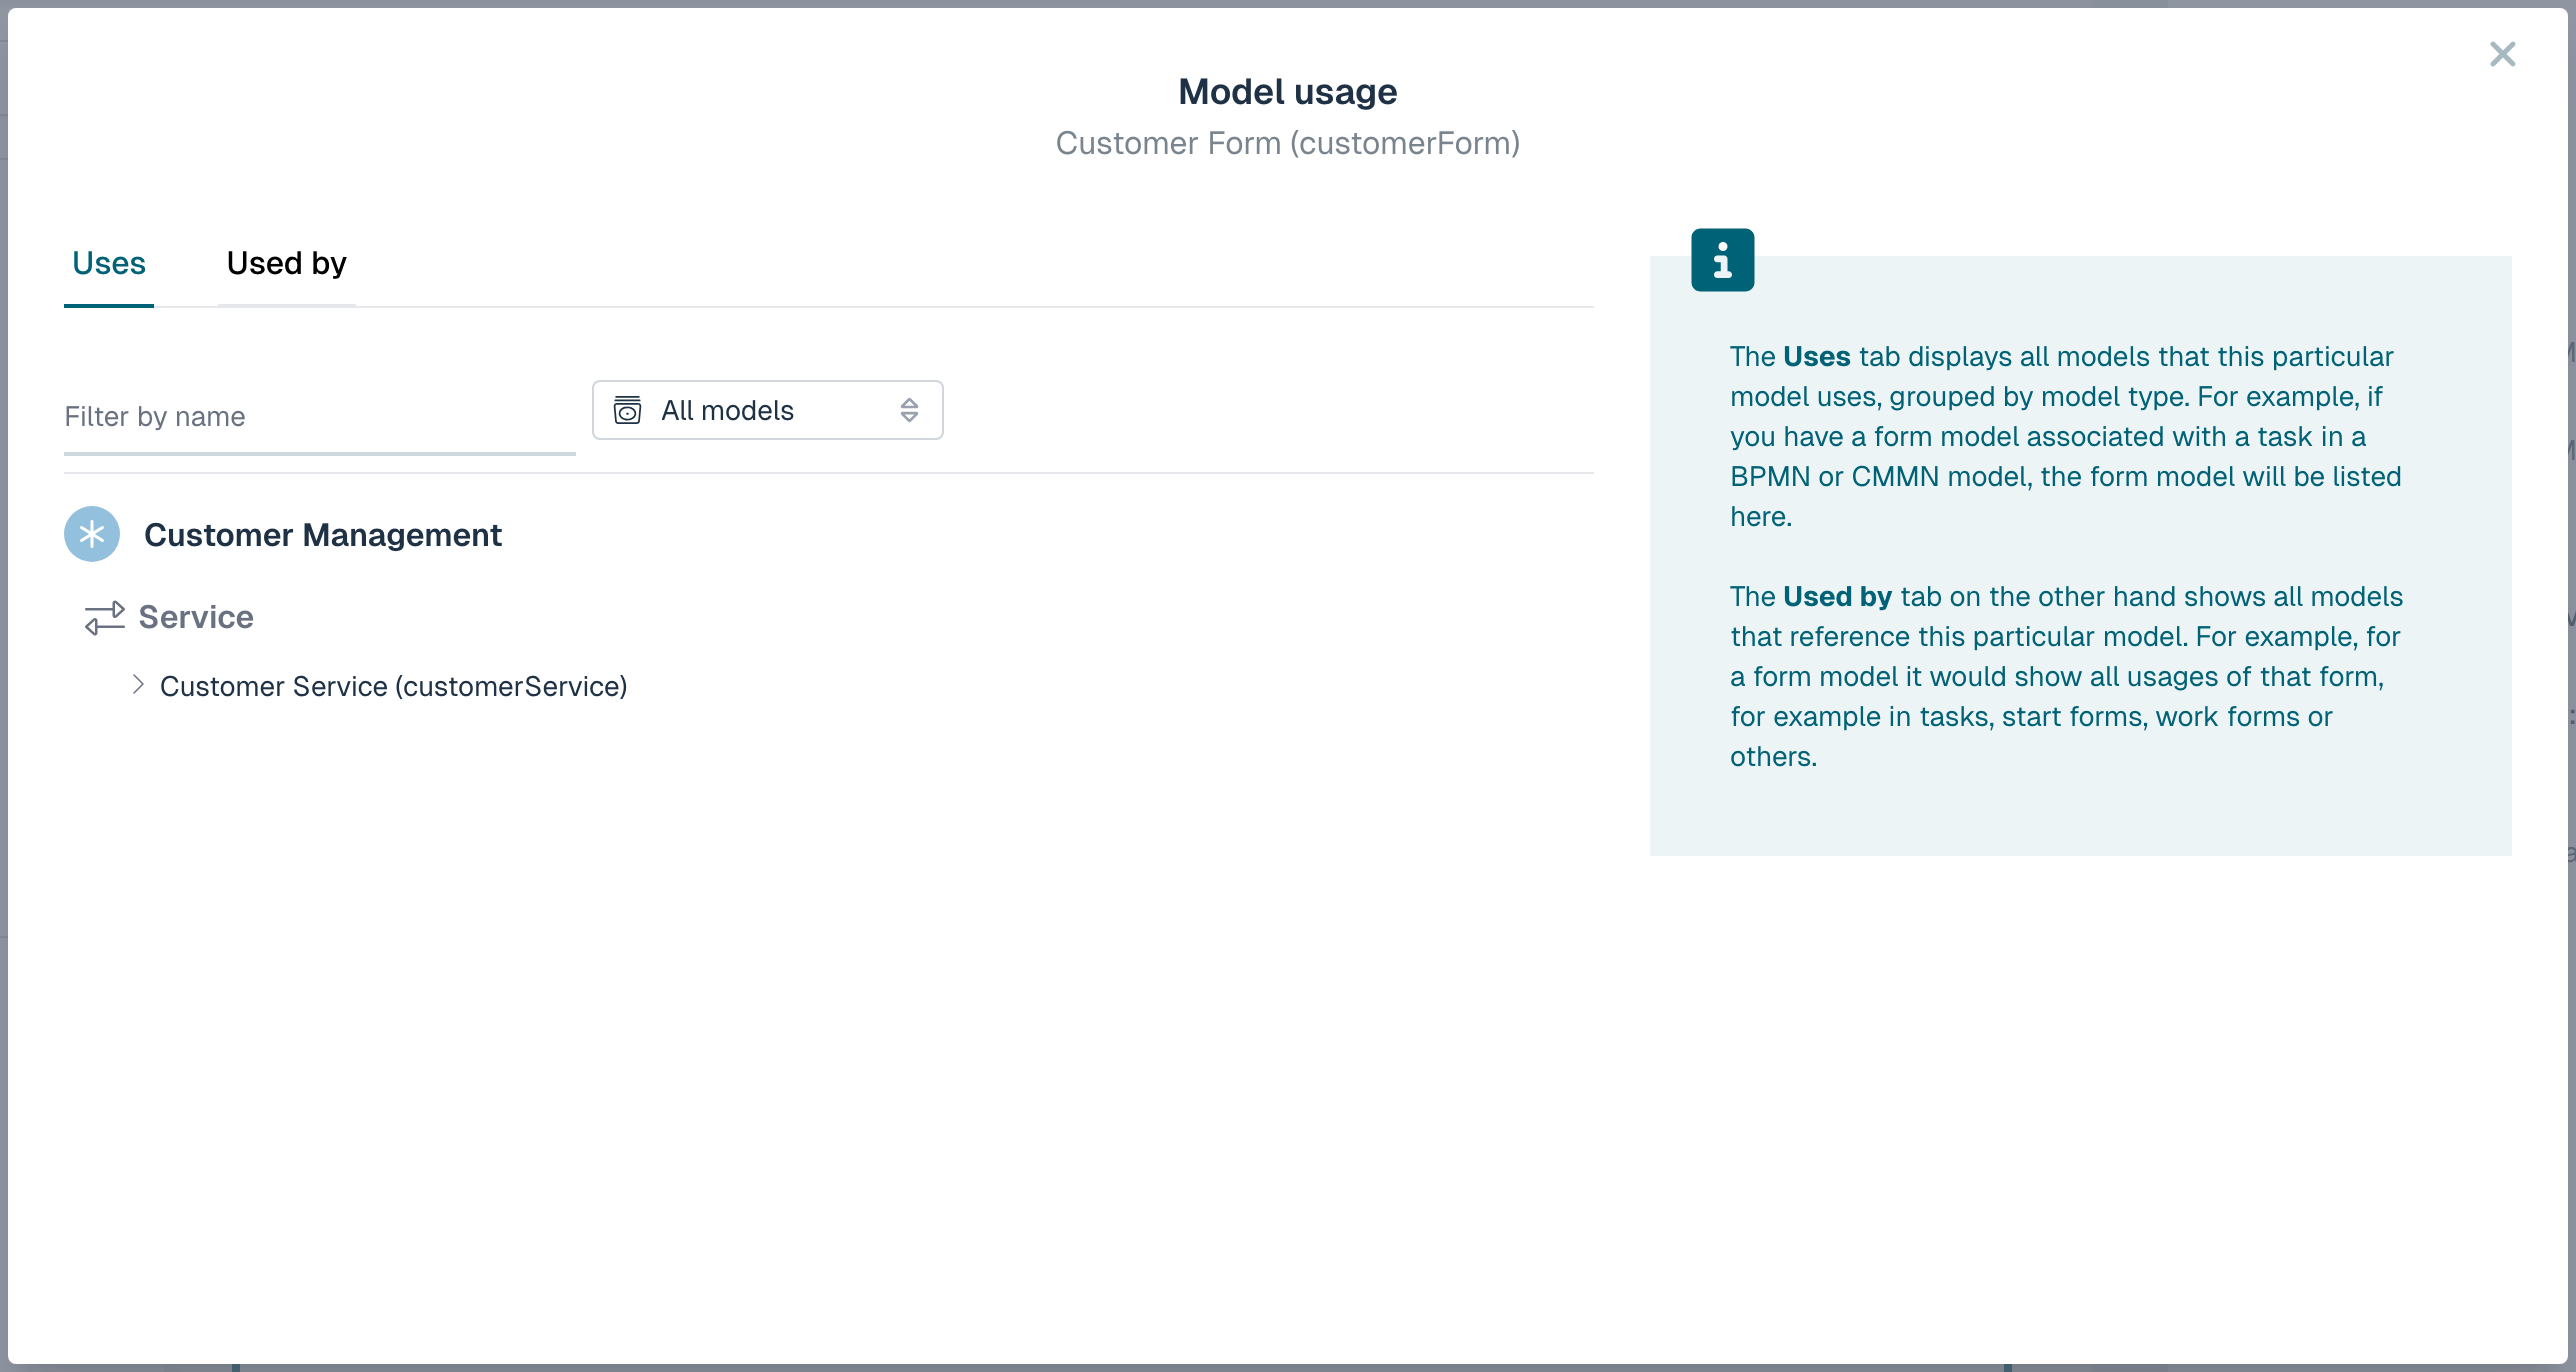
Operation-level usage for service and agent models 2026.1.0+
When the selected model is a service registry or agent model, each entry in the Used by tab can be expanded to show which elements reference it, grouped by the specific operation that is called. This lets you see, per operation, exactly which activities, plan items or fields invoke it.