Expression Button
The Expression Button executes a Form Expression and stores the value in the Value variable.
Use cases:
- When you want to set a variable when the user clicks a button.
- When you want to set a variable when a panel is rendered, for example inside a wizard. To do that you can place the button inside a panel and set its visibility to false and auto execute to true.
- To have a "calculated variable" setting auto execute and timer.
 note
noteWhen you would like to react on the change of another field you can use the event listeners of the field which changes instead.
Example: Dynamic Grocery Shopping List
Expression buttons can be triggered in several ways beyond a manual click:
- Automatically on page load (auto execute)
- Executed periodically (timer)
- Bound to a variable (auto execute expression — re-executes when the watched variable changes)
This example builds a grocery shopping list that uses expression buttons to automatically calculate item totals and the grand total.
Grocery Item Sub Form
First, create a sub form that represents a single grocery item. This form will be embedded as a multi-instance sub form in the main grocery list form.

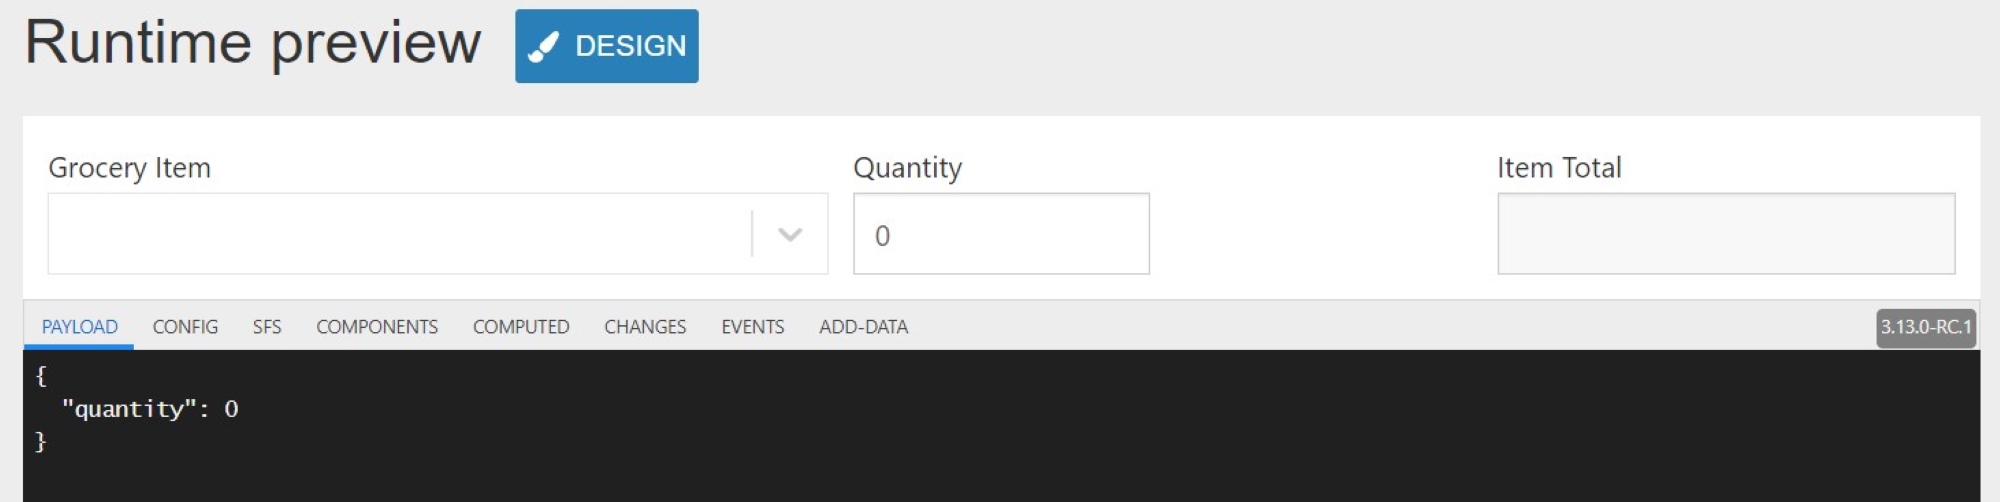
This sub form has 5 elements:
Grocery Item: A static single select bound to {{item}} with Storage set to Full value so the full item object (including its price) is available.
Quantity: A number field bound to {{quantity}} with a default value of 0.
Item Total: A text field bound to {{itemTotal}}, disabled since it is calculated by an expression button.
Reset Quantity: An expression button that resets the quantity to 1 whenever a new item is selected. Configure it as follows:
- Auto execute: bind to
{{item}}— triggers whenever the item selection changes - Value:
{{quantity}}— the variable to write to - Expression:
{{1}}— the value to set
Totalizer: An expression button that calculates the item total. Configure it as follows:
- Auto execute: bind to
{{quantity}}— triggers whenever the quantity changes - Value:
{{itemTotal}}— the variable to write to - Expression:
{{flw.numberFormat(item.value*quantity,"en_US", currency, "2", "USD")}}— multiplies quantity by item price and formats as USD
Check the Front End Functions for the available flw.* functions.
The item form can be tested in the form designer's runtime preview:
Grocery List Main Form
Create a main form that embeds the item sub form:
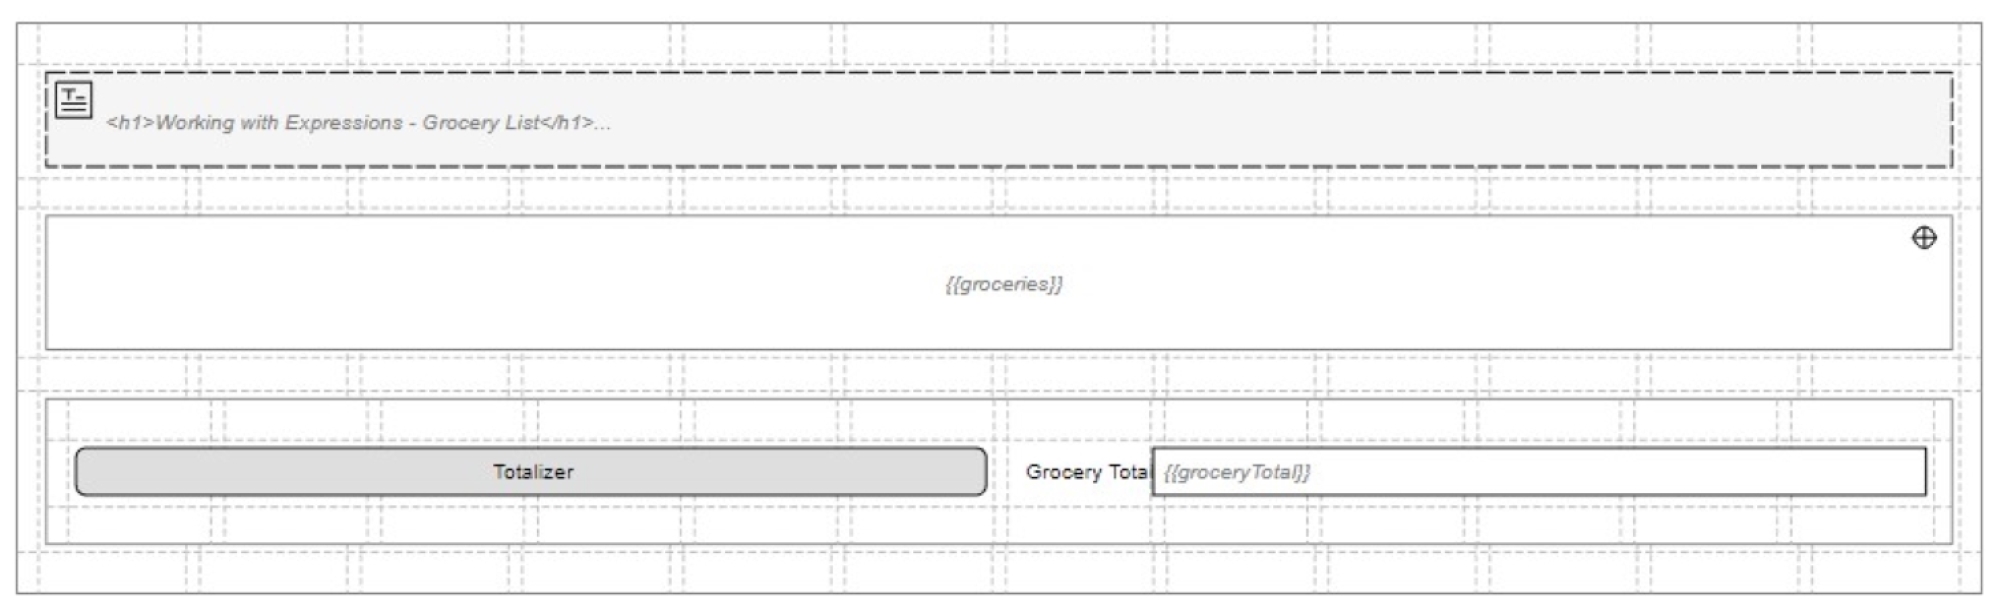
This form has 4 components:
Sub Form: Points to the grocery item form, configured with sub form data bound to {{groceries}} and multiple elements enabled with add/delete buttons.
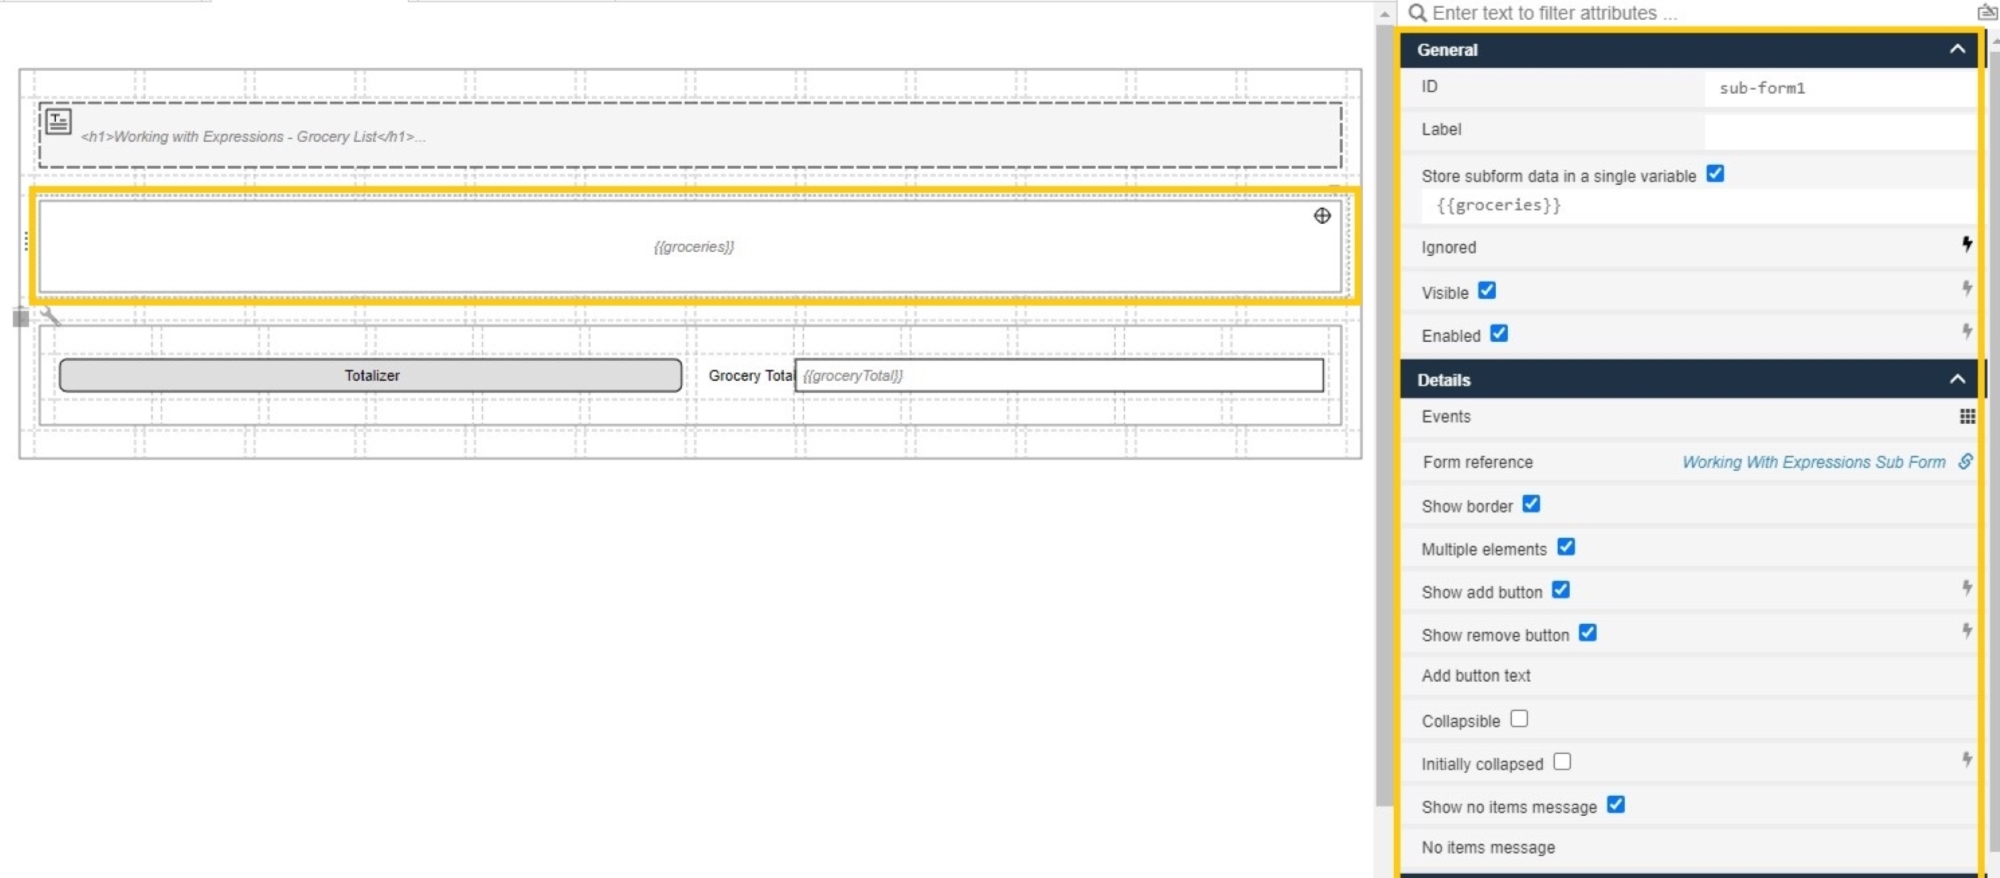
Totals Panel: A panel containing the total fields. The panel's Visible property is set to {{flw.exists(groceries)}} so it only appears once items have been added.
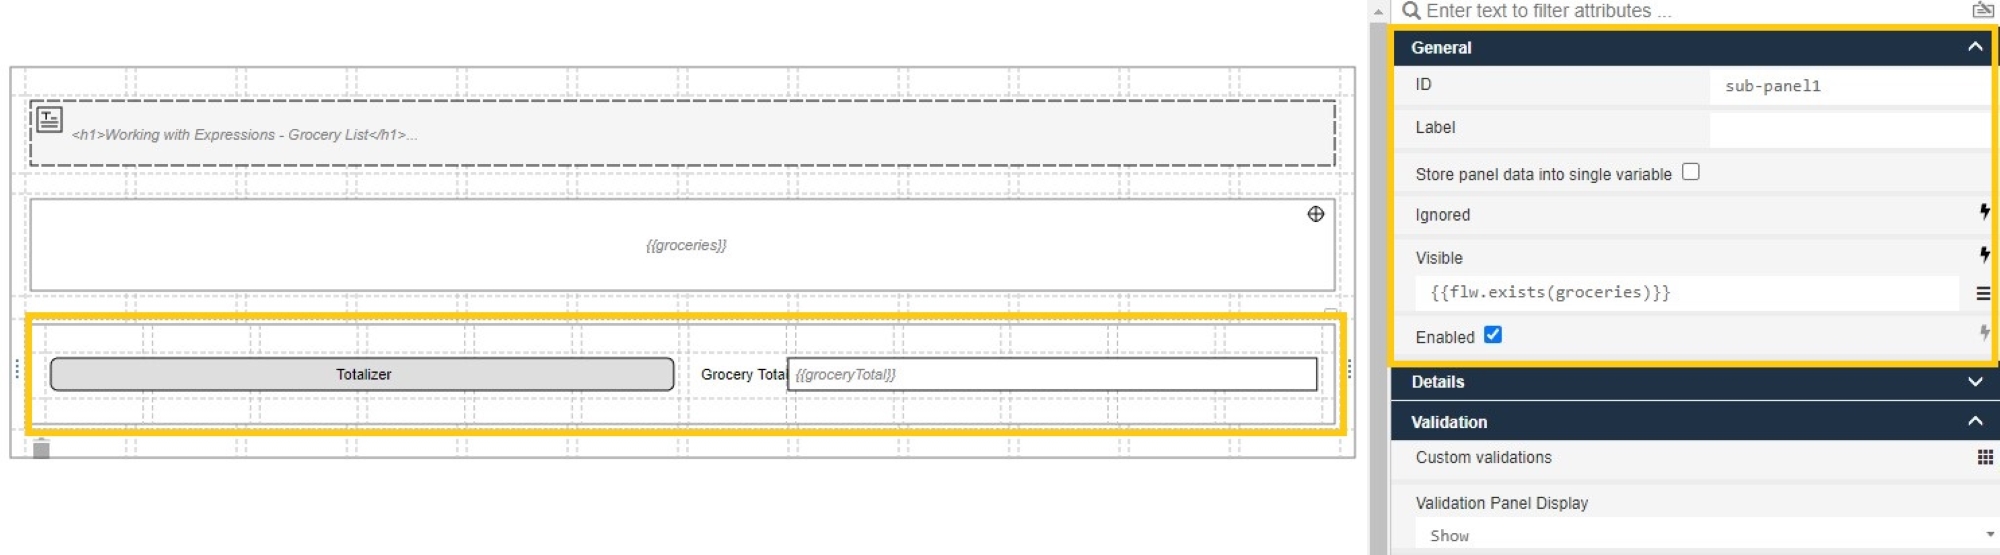
Total Cost Field: A disabled text field bound to {{groceryTotal}}, calculated by the totalizer expression button.
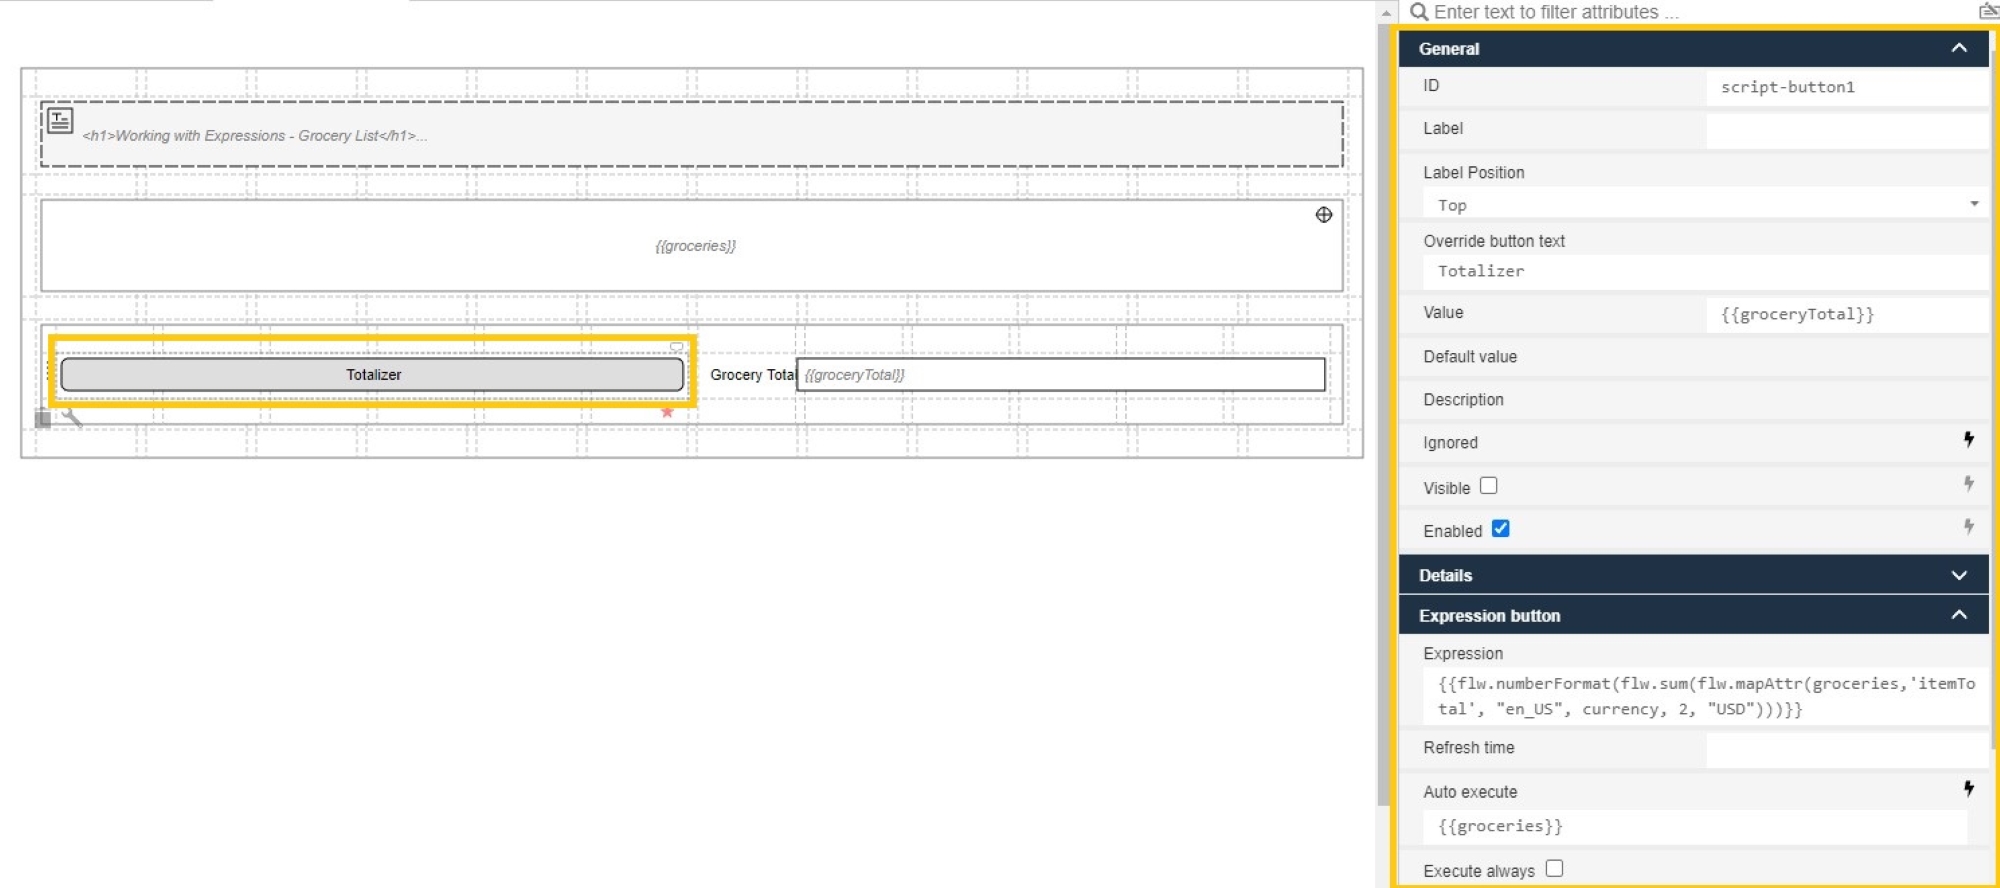
Totalizer Expression Button: Calculates the grand total whenever the {{groceries}} variable changes (items added, deleted, or updated). The expression uses flw.sum() and flw.mapAttr() to sum the itemTotal values:
{{flw.numberFormat(flw.sum(flw.mapAttr(groceries,'itemTotal', "en_US", currency, 2, "USD")))}}
Publish and Run
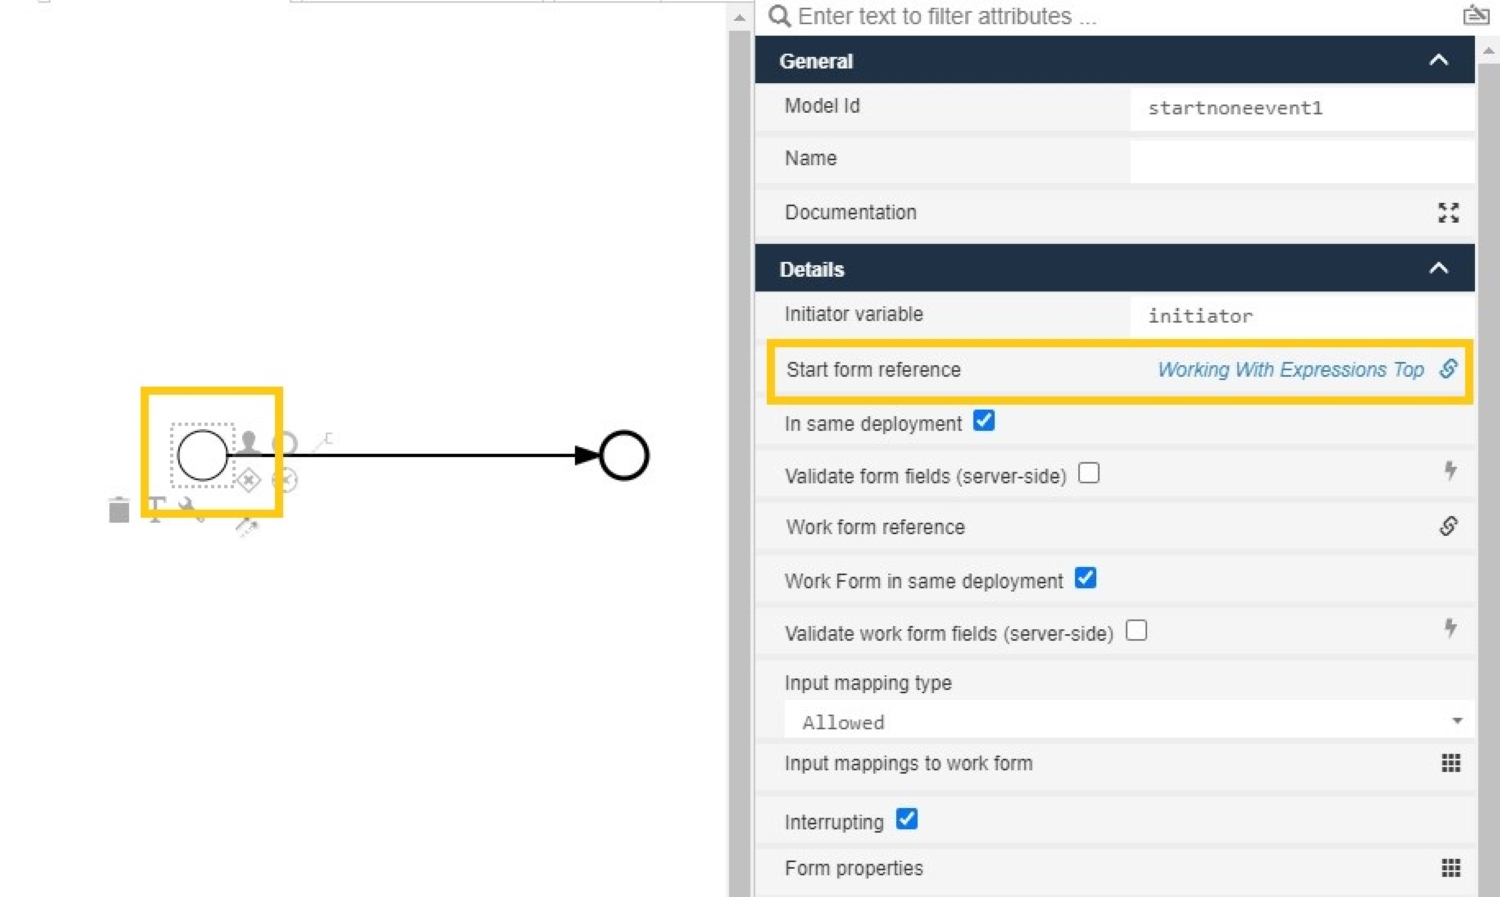
Create a simple process with the grocery list form as the start form, then publish the app.
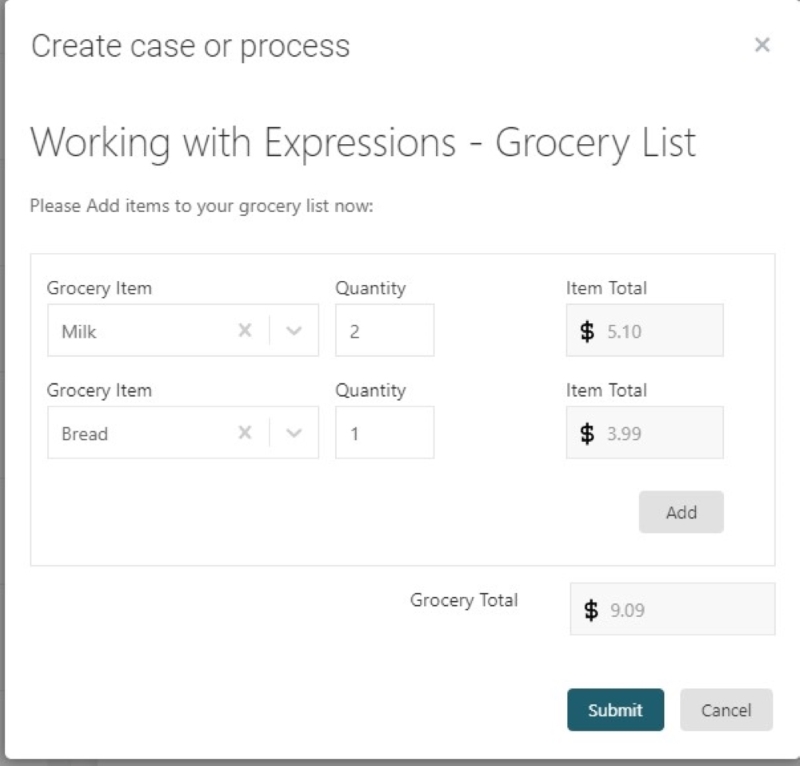
In Flowable Work, start an instance of the process and the grocery list start form is presented:
Example: Basic
Properties
General
| Attribute | Type | Description | Category |
|---|---|---|---|
| Model Id | String | This is a unique id for the component. | Every field on a form model needs a unique ID, which is automatically generated but can be changed if needed (e.g. to reference in expressions or for debugging purposes). If the field type supports rendering a label, and most types do, it can be configured here. This label is a displayed on the form to the end user and typically indicates what value is expected in the field. The documentation property holds free-form text that can be used to give more details about this script button, like its purpose, usage in other models, etc. |
| Label | Text | The label attribute adds a label to the component. | |
| Label position | Selection:
| The position of the label, you can choose between left or top. | |
| Label tooltip | Text | When it is defined, a question mark icon will appear in the component label. When the user hovers over it it will show this text in a tooltip. | |
| Documentation | MarkdownMinimal | A free-form text to explain the use cases for this form field. | |
| Value | Text | The binding for the form field. Use an appropriate expression to bind the component to its value and specify where the value is written/read. For example, use '{{myVariableName}}' to store the value of the field in a variable named 'myVariableName'. Use prefixes to define the scope of the value, for example, 'root.' for referencing the root case/process to store the value in. Please refer to the section 'Frontend expressions' in the Flowable guide for more information. | The purpose of a form is to either display some value or to have users provide values for the various fields of a form. In both situations, this value needs to be bound to an identifier using the {{myValue}} notation, and the value provided by the user will be stored in a variable with that identifier. If there already was a value bound to the identifier before, for example because another form had a field bound to the same identifier, it will be displayed. |
| Override button text | Text | Replace the default action button text with this (leave blank to use default action name) | |
| Tab Index | Integer | Determine their relative ordering for sequential focus navigation. Tab index will be ignored if the component is inside a subform. | |
| Expression | Text | The expression which will be executed to save the result into button value. | The script associated with the script button. These scripts are very powerful, but take into account the logic contained within needs to be tested and maintained, like any other software artifact. |
| Refresh time | Text | Timer, set in milliseconds, to automatically execute the script. | |
| Auto execute | Boolean | Auto execute button when rendered. | |
| Execute always | Boolean | Auto execute button when rendered even if disabled. |
Button
| Attribute | Type | Description | Category |
|---|---|---|---|
| Button alignment | Selection:
| Where the button will be aligned. | Configuration properties for how the script button is rendered on the form. |
| Tooltip | Text | When the user hovers the button it will show this text in a tooltip. | |
| Primary | Boolean | Mark the button as primary. | |
| Icon URL | Text | The URL of the icon to show. | Configuration properties for how the icon for the script button is rendered on the form. |
| Font Awesome icon name | Text | The icon name to be used for the button icon from Font Awesome. | |
| Icon alignment | Selection:
| The alignment of the icon. |
Validation
| Attribute | Type | Description | Category |
|---|---|---|---|
| Validation Panel Display | Selection:
| Display at validation panel and validation tooltip. | Providing proper data in form fields is important, especially when in process, case, decision or any other models the values provided in the form fields are used in subsequent steps. To make sure that the data is correct, validation is crucial. For this reason, a form can only be submitted when all fields are valid and thus all validation properties configured on the left apply. Check the tooltips on the properties for more information. |
| Custom validations | List | List of additional validations to apply. | The script button can have custom validation rules beyond the standard set of validations. Such a rule is written as a frontend expression in the form of {{myExpression}}. If this expression evaluates to false, the submission of the form won't be possible. |
Rendering
| Attribute | Type | Description | Category |
|---|---|---|---|
| Description | Text | The description attribute adds a description to the component. | Some field types have an extra line of text displayed to give the user more details about the field. |
| Ignored | Boolean | If true the component will be hidden and the value will not be part of any payload. | Fields can also be shown or hidden based on the visible condition. This can be a frontend expression in the form of {{myExpression}} which can reference other form field values by their IDs. Fields can also be enabled or disabled, and similarly this can be made dynamic based on a frontend expression. Some field types can be ignored (the property is shown here if that's the case), which means that its value won't be taken into account. |
| Visible | Boolean | Boolean value or expression specifies whether the component is visible or hidden. This expression might include another value in the same form, for instance use a checkbox bound to {{showAdditionalFields}} and use the very same expression as the visible attribute to show or hide the component according the checked state of the checkbox. If you want to only show the component, if the form is not used as the init-form, you can use the expression '{{root.id}}' which evaluates to true only, if there is a current case id which is not the case in an initialization form. | |
| Enabled | Boolean | Boolean value or expression specifies whether component is enabled or disabled. | |
| Style class | Text | Stylesheet class name. Add any style classes to be applied to the component for the desired styling and rendering. | The script button can get customized CSS classes to customize the default styling. Note that the CSS files needed for the customizations must be available on the runtime system. |
Advanced
| Attribute | Type | Description | Category |
|---|---|---|---|
| Events | List | The script button emits low-level events on which can be reacted with a frontend expression to implement various use cases that are not possible with regular modeling. If the expression produces a value, it can be stored in a new variable using the Result variable property. |
List Attribute Details
Custom validations
| Attribute | Type | Description |
|---|---|---|
| Expression | Text | Validation passes when this expression is true. |
| Error message | Text | Message to display when the validation fails. |
Events
| Attribute | Type | Description |
|---|---|---|
| Event label | Text | This is a unique id for the component. |
| Event type | Selection:
| The type of event emitted by the form field. |
| Expression | Text | Validation passes when this expression is true. |
| Result variable | Text | Capture the result of the expression in a result variable. |
Events
| Event | When | Additional | Cancellable |
|---|---|---|---|
Button.click | Any button is clicked | Definition + State | Yes |
See section Events for more information.