Contacts
The Contacts button gives you access to the list of contacts.

When you click on Contacts the inbox loads the list of all your contacts with
their respective roles.
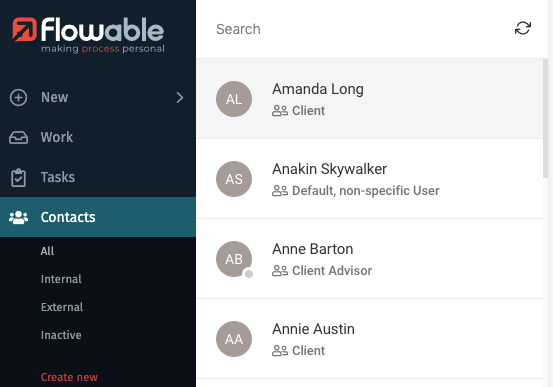
If there are any visible filters for contacts, they are also shown. For example, the filter Internal only shows contacts of your organization, while the filter external shows you external clients. The button for creating a new contact is also shown.

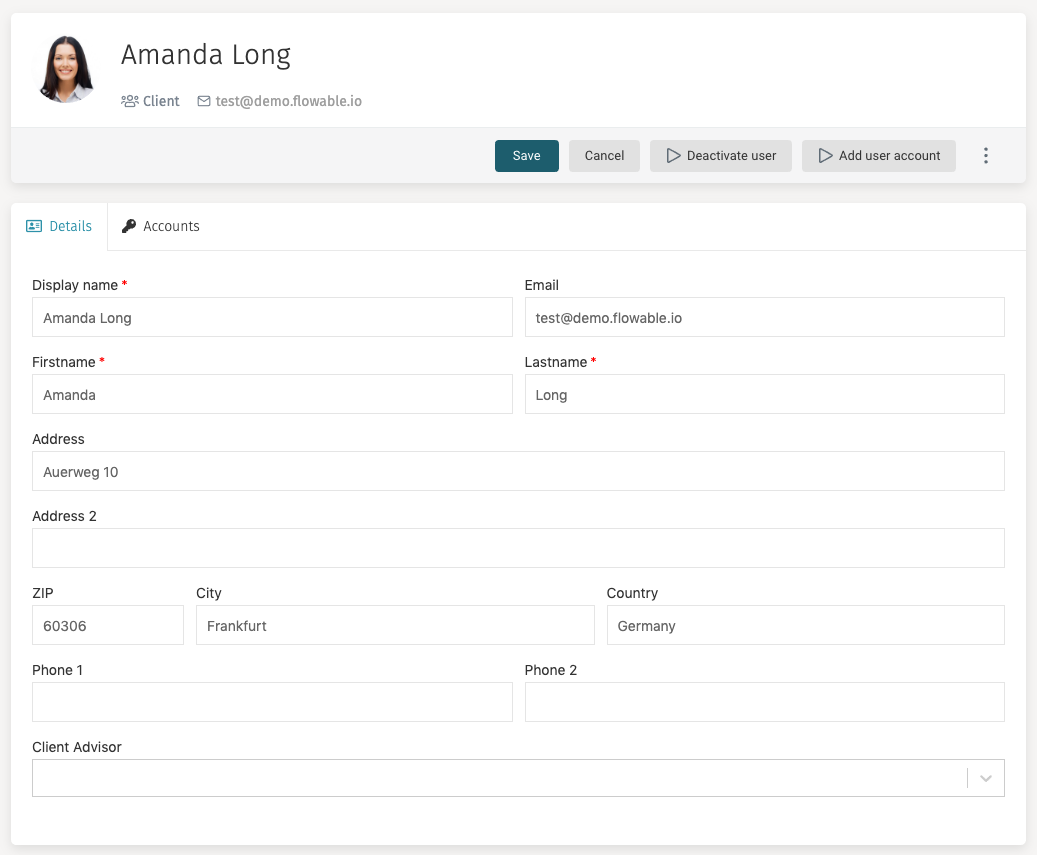
Contact Details
The details panel of a selected contact contains all the information about the contact,
a navigation bar to choose between contact details and accounts, an Edit button
(if you have the appropriate permissions to do so), a button for additional actions,
and a main area to interact with the selected contact.
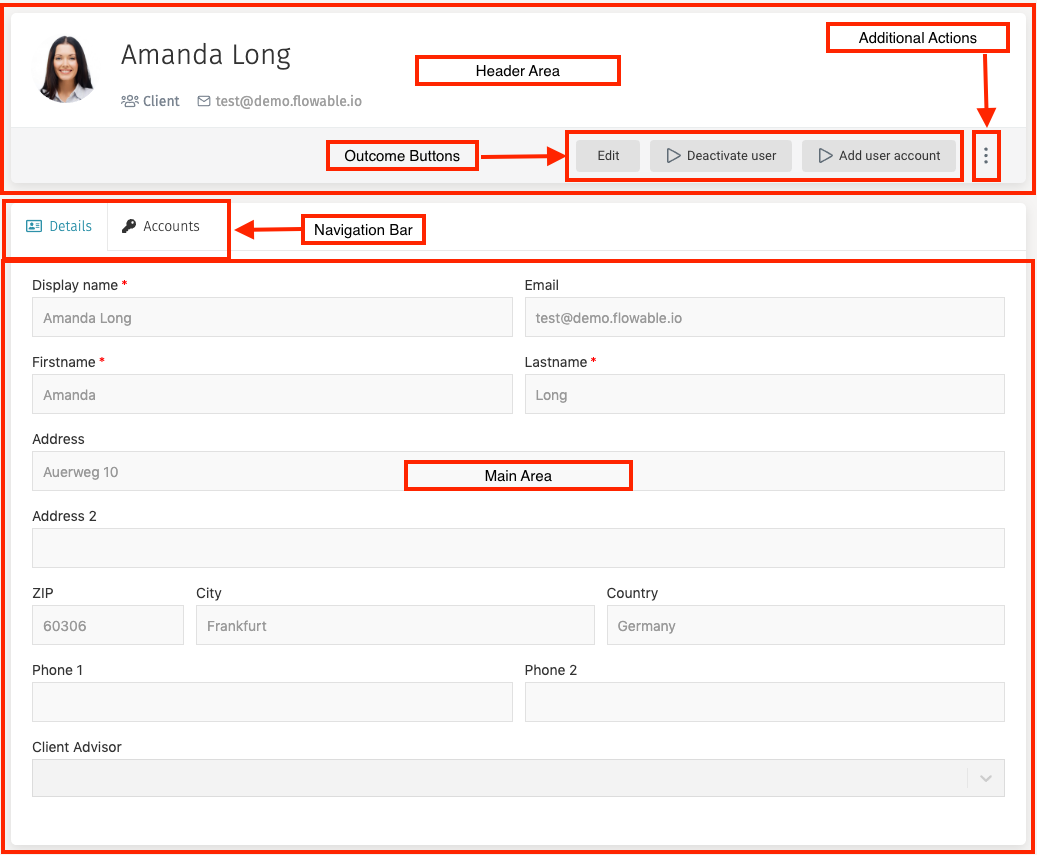
Header
The header contains the display name of the user, their role, their email, an Edit
button and additional actions menu dropdown.

 tip
tipIf you click on the email of the contact, you can send him an email using your favorite email software.
Navigation Bar
When you have a contact selected in the inbox and the details panel loads its information, a navigation bar is shown on the main area. This bar provides you access to the details of the contact and their accounts.

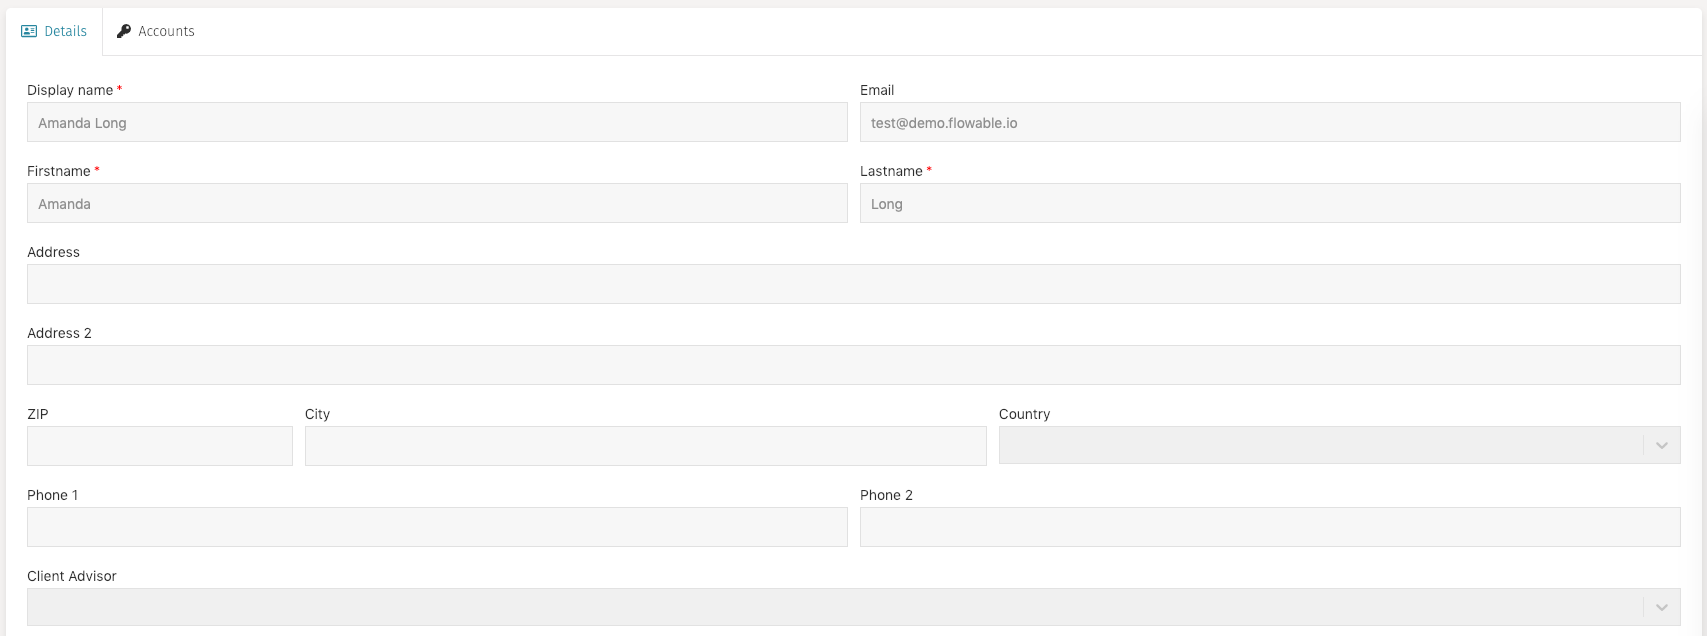
Details
The details tab is the default tab of the contact details view. It shows all the main information of the contact: First name, Last name, email as well as additional information that is only shown if the contact has a specific role. For example, a client contact has fields for their address, and a selection field to specify the client advisor of the contact.
Accounts
The accounts tab shows the accounts of the contact, if any.
Editing a Contact
While visualizing the details of a contact you can click on the Edit button on
the header area to make modifications to their information. The details panel
then changes to an edit mode that lets you modify the fields, and the
Edit button is replaced by a Save button and a Cancel button.
Once you have finished the modifications, you can save them by clicking on Save.
In case you want to discard the modifications, you can press Cancel
and any unsaved changes are not applied.
If you have created a custom contact form, then define the keys of the forms you want, along with the permissions in the user definition model, as below:
{
"key": "contact",
"name": "Contact User",
"description": "Creates a new contact user.",
"forms":
{ "init": "F01_userInitFormDefault", "view": "F02_userViewFormDefault", "edit": "F03_userEditFormDefault" }

,
"actionPermissions":
{ "create": [ "flowableAdministrator" ], "edit": [ "flowableAdministrator" ] }

}
]
You will also need to ensure that the additional variables from the custom form are explicitly added to the restVariables property of the user definition model:
"restVariables": {
 "all": [
 "clientAdvisorId", "address", "address2", "zip", "city", "country", "phone1", "phone2"
 ]
},
If the variables are not here, then they will be ignored and you will not be able to update them.
The following variables are added by default: "email", "firstName", "lastName", "displayName", "language" and "theme".
Deactivate User
The Deactivate user button provides a way to deactivate a contact and their
associated accounts.
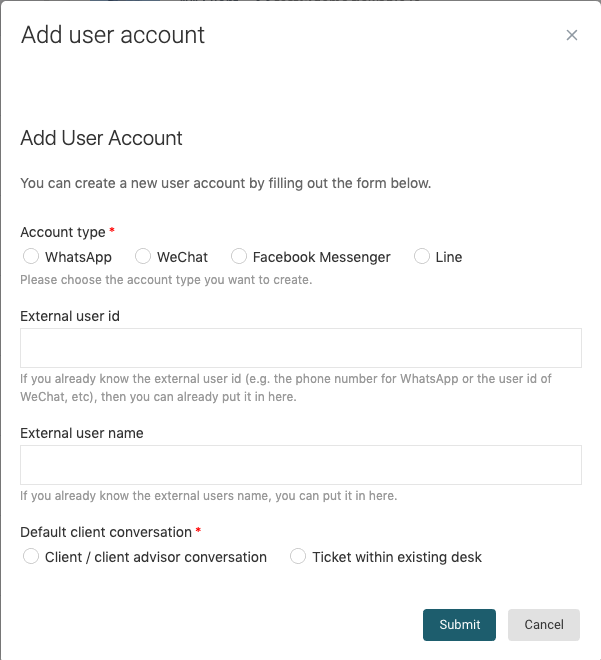
Add User Account
Clicking the Add user account opens a dialog where various account information
can be provided.
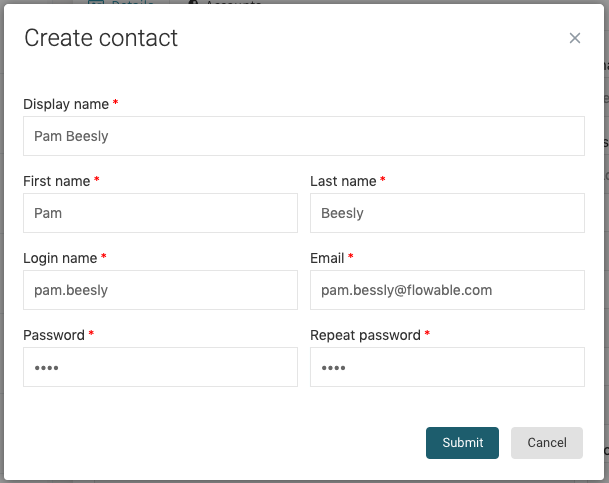
Creating New Contacts
When you click on the Create new item in the Contacts section, a window appears which lets you select the profile (also called technically user definition) of the user you want to create. The profile of the contact determines which functions he is able to access and perform.
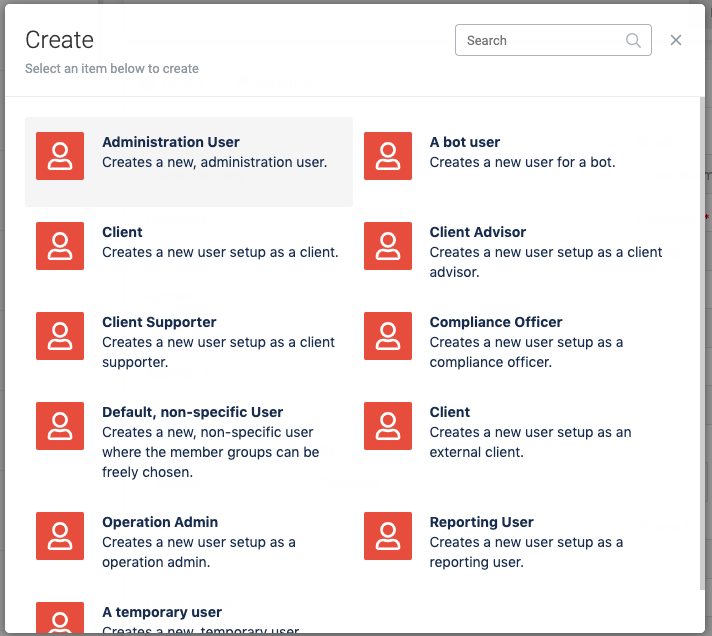
After selecting the profile, the window shows the fields needed for creating the
contact. Mandatory fields are marked with a red asterisk (*), and the fields
that are shown are determined by the profile that was selected. For example, in
order to create an external client you need to select a Client advisor for him.
Once you have filled in all mandatory fields, you can press on the Submit
button. The window closes and your recently created contact is loaded into
the details pane.